Saturday, December 23, 2017

Maple Gingerbread

This recipe results in a delicious non-traditional gingerbread. Although it can be made any time of year, I made this for Christmas this year. I found this recipe in Mom's cookie recipe box. The recipe is a type of quick bread recipe, rather than cookie recipe. But when made in a large pan, it can be cut into cookie-sized pieces and included in a holiday cookie plate.

The recipe uses maple syrup instead of molasses or dark brown sugar, which gives traditional gingerbread its darker coloring. So, this gingerbread is lighter in color and does not appear to be gingerbread. But it is a delicious variation of gingerbread. Next time I make this gingerbread, I might try a cream cheese frosting. This time, I added chopped candied ginger, which added a nice extra zing to the gingerbread.

Maple Gingerbread 
  • 1 cup maple syrup
  • 1 cup sour cream
  • 1/4 cup melted butter
  • 1 egg, well beaten
  • 2 1/3 cup flour
  • 1 3/4 tsp. baking soda
  • 1 1/2 tsp. ginger
  • 1/2 tsp. salt
  • 1/4 cup chopped candied ginger
Combine syrup, sour cream, butter, and egg; beat well. Gradually add in flour, baking soda, ginger, salt. Beat until smooth. Blend in the candied ginger. Turn into a greased 9X13 pan and press to even the dough. Bake at 350 for 30 minutes or until done. Allow to cool before cutting. Enjoy!

Sunday, December 17, 2017

Orange Drop Cookies

This recipe is a terrific Christmas cookie recipe. Although I found the index card for this recipe in Mom's recipe box, it is not her handwriting, so I suspect she got the recipe from someone after tasting these tasty cookies. The orange flavor is delicious and festive for the holiday season, but could be delicious any time of year. This recipe yields a lot of cookies, about six dozen. The cookies freeze well, so they can be saved for later.

The recipe is quite simple. I used all butter, instead of shortening and margarine. The recipe does not specify which type of nuts to use. I used hazelnuts, but many other nuts could be used or you could leave out the nuts completely. Also, next time I make this recipe, I might add in dried cranberries. Also, I only frosted about half of the cookies. These cookies are terrific with or without the frosting.

Orange Drop Cookies 
  • 1 cup butter
  • 1 1/2 cup brown sugar
  • 2 eggs 
  • 2 Tbsp.  grated orange peel
  • 1/4 cup orange juice
  • 1 tsp. vanilla
  • 1 cup buttermilk
  • 3 1/2 cups flour
  • 2 tsp. baking pwoder
  • 1 tsp. baking soda
  • 1 cup chopped nuts
  • 2 Tbsp. butter, softened
  • 2 cups powdered sugar
  • Orange juice and grated peel to taste
Cream 1 cup butter and brown sugar. Beat in eggs, peel, orange juice, vanilla, and milk. Add in flour, baking powder, and baking soda. Blend in the nuts. Drop by spoonful onto a baking sheet. Bake at 350 for 12 to 13 minutes. Allow to cool before frosting. To make the frosting, blend the softened butter with the powdered sugar. Add orange juice and grated peel to taste and to spreading consistency. Spread the frosting on the cookies. Enjoy!

Sunday, December 3, 2017

Maple Cookies

I found this recipe in Mom's cookie recipe box. I made these cookies for Thanksgiving this year, which was celebrated at Rich and Christen's house. These cookies are so delicious, it was hard to stop eating them. But, the recipe yields a whole lot of cookies, so this is a great recipe when you need to feed a bunch. The cookies are a variation on sugar cookies, with a bit of maple flavor. The dough is a rolled out, so you could use any type of cookie cutter. I used a basic circle cookie cutter.

The recipe below is just a little different from Mom's recipe pictured below. I did not have maple extract, but I did have maple syrup, so I just reduced the sugar from the original recipe and added a little vanilla. Like other sugar cookies, you could frost these cookies. I would consider trying a maple glaze frosting, using maple syrup and powdered sugar. Whether you frost these cookies or eat them plain, you will love these tasty cookies.

Maple Cookies 
  • 4 cups flour
  • 1 tsp. baking powder
  • 1 tsp. salt
  • 1/4 tsp. baking soda
  • 1 1/4 cup butter, softened
  • 1 cup brown sugar
  • 1 tsp. vanilla
  • 4 Tbsp. maple syrup
  • 2 eggs
Sift flour, baking powder, salt, and baking soda together. Blend in butter, sugar, vanilla, maple syrup, and eggs. Beat until well blended. Chill dough overnight.

Roll out a small amount of dough on a well-floured board until 1/8 inch think. Bake at 350 for about 8 minutes on greased baking sheet. Allow to cool. Enjoy!


Saturday, November 18, 2017

Blueberry Pie Bread

MDS and I used to get delicious pie breads at a local farmer's market. The pie breads came in many varieties: apple, peach, and cherry. I enjoy all the different flavors, but blueberry pie bread is my favorite. Pie bread turns a basic bread into a sweet treat by dispersing pie filling within the loaf of bread. This bread is terrific fresh out of the oven or warmed in the microwave. And this bread makes excellent french toast.

Pie breads are easy to make at home. I used my Mom's french bread recipe. I also think a brioche bread recipe would be delicious. You can use any type of pie filling. It is easy to make your own pie filling, or, just use canned pie filling. The bread is topped with a streusel that adds a nice touch. Sometimes, the pie filling collects in one place within the bread making it slightly messy to eat. The bread could be assembled by covering small chunks of dough in the pie filling and dropping them into the pan. I found that it is easiest to spread the filling before rolling up the loaf and then twisting the resulting loaf to spread the pie filling around.

Blueberry Pie Bread 
  • 2 1/2 to 3 cups flour
  • 1 Tbsp. sugar
  • 1 tp. salt
  • 1 1/2 tsp. yeast
  • 1 Tbsp. butter
  • 1 cup water 
  • 1 cup blueberry pie filling
  • 1/8 cup brown sugar
  • 1/8 cup flour
  • 1 Tbsp. butter, softened
  • Dash of vanilla
In large bowl, mix 3/4 cups flour, sugar, salt and yeast. Heat water to 120 degrees and add the butter to the water. Add the water and butter to the flour mixture. Mix well with a fork. At this point the dough should be fairly liquid. Once the mixture is smooth, add in more flour (usually 1 to 1 1/2 more cups) until a soft dough is formed. Then, turn the dough onto a floured surface. Knead, incorporating the remaining flour in as you go, for about 8 minutes. The dough should become somewhat elastic. Form the dough into a ball and place in a greased bowl. Cover the bowl with a towel (use a damp towel if the weather is dry) and let the dough rise until it doubles, about 2 hours.

Punch down the dough and turn out onto a floured surface. Let rest about 10 minutes. Roll out the dough so it is about 12 to 15 inches long. Spread the pie filling on the flattened dough. Then, roll the dough to form a loaf. Twist the loaf several time, then fold in half lengthwise. Place in a greased loaf pan. Cover the dough with a towel and let rise again, for about an hour.

Prepare the streusel stopping by blending together the brown sugar, flour, butter, and vanilla. Crumble the topping over the loaf. Bake at 350 degrees for about 45 minutes. Allow to cool. Enjoy!

Friday, November 10, 2017

Turkey Noodle Bake

In November, turkey becomes the focus of many menus. And, growing up, after Thanksgiving, it seemed that we were eating turkey forever. So it was not uncommon for Mom to use up some of the turkey in a casserole such as this recipe. After making this casserole, I remember it from childhood. Like many casseroles, this one is super easy to make and is delicious.

When I made this, I used cream of celery soup instead cream of mushroom soup. I notice that Mom's recipe forgot to include turkey in the ingredient list, so I suggest using 1-3 cups of chopped up cooked turkey. The recipe also calls for using frozen broccoli and cauliflower, but fresh vegetables could be used instead. I made this recipe with Swiss cheese, but as the recipe says, other cheeses could be used.

Turkey Noodle Bake 
  • 8 ounces egg noodles
  • 10 ounces cauliflower, chopped
  • 10 ounces broccoli, chopped
  • 1 can cream of mushroom soup, undiluted
  • 1 cup sour cream
  • 1 medium onion chopped
  • 1 tsp. pepper
  • 1 1/2 cup shredded cheese (Swiss, Muenster or cheddar)
  • 1-3 cups cooked chopped turkey
Cook the noodles and drain. In a large bowl, mix noodles, cauliflower, broccoli, soup, sour cream, onion, pepper, cheese and turkey. Transfer to a 13x9 pan. Bake at 350 for 30 minutes. Let rest for about ten minutes. Enjoy!

Saturday, November 4, 2017

Criner Caramel Popcorn

While I have had caramel popcorn before, I don't think that I ever had homemade caramel popcorn until I was recently at a get-together at Amanda's and Brian's house. Nowadays, parties at the Criner/Isleb house typically involve a wonderful buffet spread of food that is a free-for-all among the many kids and adults gathered. In fact, these get-togethers are much like any Buckley family gathering. Back to the popcorn, which was put out at a recent party. I could not stop eating it. Even when other terrific food was put out, I kept going back to the popcorn because homemade caramel popcorn is so much better than store-bought popcorn.

It turns out that this deliciously addictive caramel popcorn was made by Amanda's Mom, Karen Criner. So of course, I had to get the recipe to share here. The recipe came with some helpful hints. While working with the caramel, it is quite sticky, so use cooking spray or oil on your utensils. Also, do your best to remove any kernels. I tried, but missed at least two kernels, and MDS and I each bit down on one. For my own tip, I struggled to completely coat the popcorn with the caramel. I found that while baking, I removed the popcorn from the oven about every ten minutes to stir to help better coat the popcorn. Although this delicious treat does take some work, it is worth it, especially to enjoy while still warm.

Criner Caramel Popcorn 
  • 4 quarts popped popcorn
  • 1 cup brown sugar
  • 1/2 cup light corn syrup
  • 1/2 cup butter
  • 1/2 tsp. salt
  • 1/2 tsp. baking soda
  • 1 tsp. vanilla
Spray a large roasting pan (or two large edged cookie sheets) with cooking spray or oil. Add popcorn and place in preheated oven at 250 degreed while preparing caramel. Mix brown sugar, corn syrup, butter and salt in saucepan. Stirring constantly, bring to a boil over medium heat. Boil for five minutes without stirring. Remove from heat. Stir in baking soda and vanilla. Mix well. Pour over warm popcorn, stirring to coat evenly. Bake for 45 minute, stirring occasionally. Remove from oven and spread on foil that has been sprayed or oiled. Allow to cool and break apart. Store in a tightly covered container. Enjoy!

Sunday, October 22, 2017

Pork Chop Creole

While I do not remember this recipe specifically, I see why Mom had in in her recipe box. This recipe is so easy and so delicious. After you get it started, it just needs some time, which frees you up to make other items for a meal, or do nothing at all. I am not sure why this recipe has creole in its name. It does have a similar flavor to many creole dishes, but it does not have celery, which is part of the standard onion, green pepper, celery mix known as the Creole trinity in cooking circles. This recipe would easily benefit from adding celery, so maybe next time I will give it a try to make it a true Creole recipe.

There was plenty of extra sauce left over, so I made some egg noodle to mix in with the extra sauce. You could also use rice or serve some bread to soak up the sauce. Mom's recipe calls for using drippings, which I remember her saving from cooking various meats. I do not save drippings, so I just used olive oil.

Pork Chop Creole 
  • 4 pork chops, about one-inch thick
  • 2 Tbsps. cooking oil
  • 1 cup tomato juice
  • 1/2 cup water
  • 1 envelope onion gravy mix
  • 1/4 cup chopped green pepper
Brown the chops on both sides in the cooking oil in a heavy skillet. Remove the chops from the pan and set aside. Blend the remaining ingredients into the drippings. Return chops to the pan. Cover and simmer for about 45 minutes or until the chops are tender. Enjoy!

Saturday, October 7, 2017

Applesauce Bars

Here is another gem from Grandma Holmes's recipe collection. As you can see from Grandma Holmes's notes on her recipe card below, the result is more cake than cookie. With bar in the name, you might expect this to be chewy like a cookie. This recipe might be better titled Applesauce Cake. Whatever you call them, as Grandma Holmes notes, they are tasty. While I frequently leave out nuts or raisins in some baked goods, I used them this time, and MDS still liked them.

When I made this recipe, it only needed about 35 minutes, not 50 minutes, in the oven. I did not have cloves, so I just used a little more cinnamon. Grandma Holmes' notes on her recipe card say that this recipe is spicy. I did not find it to be spicy, but maybe that is because I did not use cloves. Grandma Holmes also wrote that the topping gets hard. I did not find that to be so, but I might have used a bit too many cornflakes because some of the cornflake pieces did not stick to the top of the bars. I did enjoy the crunch of the cornflakes.

Applesauce Bars 
  • 2/3 cup crushed cornflakes
  • 1 1/4 cups sugar, divided
  • 10 Tbsp. butter, divided
  • 1 cup unsweetened applesauce
  • 1 tsp. vanilla
  • 2 cups flour
  • 1 tsp. baking soda
  • 1 tsp. nutmeg
  • 1 tsp. cinnamon
  • 1/2 tsp. salt
  • 1 cup raisins
  • 1/2 cup chopped walnuts

Combine 2 tablespoons softened butter, 1/4 cup sugar, and crushed cornflakes. Set aside. In another bowl, combine 1 cup sugar, 8 tablespoons softened buttered, applesauce and vanilla. Blend in the flour, baking soda, nutmeg, cinnamon, salt, raisins and walnuts. Spread batter into a greased 9X9 pan. Sprinkle the corn flake mixture on top. Bake at 350 for about 35 minutes or until a toothpick comes out clean. Allow to cool before cutting into bars. Enjoy!


Sunday, October 1, 2017

Tunawich

Why settle for ordinary tuna salad, when you could enjoy these tasty warm tuna sandwiches? Tuna salad is great for on-the-go sandwiches, but these tunawiches are better. There is just something about having a warm sandwich. And, by browning the patties, there is a nice crunch and flavor. The sandwiches can be dressed up with toppings such as cheese, grilled onions or pickles. Although the tunawiches do not really need sauce, they would be good with BBQ sauce or mustard or some other sauce.

This recipe could easily be modified to add different flavors. I think that adding an herb such as parsley would be delicious. The celery adds an excellent flavor, but so too could olives or bell pepper. I substituted Tabasco for the chili sauce, so I used only 1/2 teaspoon. For buns, I used Hawaiian sweet rolls, so I made smaller patties to fit the rolls. Mom's recipe called for toasting the buns, which might be great for other buns, but the Hawaiian rolls were terrific not toasted. The recipe is quick and easy, so this would be great for a busy weeknight dinner.

Tunawich 
  • 7 oz. tuna, drained and flaked
  • 1/2 cup bread crumbs
  • 1/2 cup chopped celery
  • 2 Tbsp. minced onion
  • 1/3 cup mayonaaise
  • 2 tsp. chili sauce
  • 1 tsp. lemon juice
  • buns or rolls
Combine the tuna, bread crumbs, celery and onion. Blend in the mayonnaise, chili sauce and lemon juice. Form into patties to fit the buns. Fry in a lightly oiled skillet for about five minutes per side or until browned. Serve on bun with lettuce and tomato. Enjoy!

Saturday, September 16, 2017

Orange Rum Pizzelle

I have posted about pizzelles before and will do so again. Here are my posts on standard pizzelles, chocolate pizzelles, or anise pizzelles. This orange rum variation is delicious. To be honest, I did not even taste the rum in the final product and the alcohol probably cooks off, so I think this recipe is fine for kids. As for the orange peel, I used dried orange peel, but fresh orange peel would be great. As with all pizzelles, they are especially delicious when they are fresh off the press and still soft.

Normally, I do not like to have such a specialized item, like a pizzelle maker, in my kitchen, but with so many varieties of pizzelles that can be made, my pizzelle maker does not seem to be limited in its use. I especially use the pizzelle make in summer when it is too hot to turn on the oven to make other cookies. So, if you want to enjoy pizzelles sometime, but do not want to buy a pizzelle maker, invite me and my pizzelle maker over and we can have a pizzelle party.

Orange Rum Pizzelles 
  • 3 eggs, room temperature
  • 3/4 cup sugar
  • 1/2 cup butter
  • 2 tsp. rum
  • 4 tsp. orange peel
  • 2 cups flour
  • 2 tsp. baking powder
  • powdered sugar for dusting
In a large mixing bowl, beat the eggs and sugar. Add the softened butter, rum, and orange peel. Gradually add the flour and baking powder. The batter should be stiff enough to drop by spoon.

Preheat the pizzelle maker. Drop the batter onto each plate, close the pizzelle maker and allow to cook for about one minute. Remove each pizzelle to a flat surface to cool. Dust with powdered sugar. Enjoy!

Saturday, September 9, 2017

Bayou Goo Pie

Recently, Hurricane Harvey wrecked havoc on the Houston area, so I have been thinking about my visit to Houston earlier this year. MDS and I were pleasantly surprised by how much we enjoyed visiting Houston. We especially enjoyed the terrific food while we were there. So when I heard of a local place called House of Pies, I knew I needed to make a stop. As you might expect from its name, House of Pies offers so many types of pies, it would take quite a long time to sample them all. But the Bayou Goo Pie on the menu caught my eye and did not disappoint. House of Pies also serves delicious food, so bring your appetite. I do not know if House of Pies suffered damage from Hurricane Harvey, but if I make it back to Houston, I will definitely seek out House of Pies again.

In the Houston area, bayous are quite common. Bayous are swampy or slow moving rivers in tidal areas. Buffalo Bayou runs through downtown Houston. In places, it has been channelized and developed. But in many places, it is lined by parks so it was part of my morning runs while I was there. Much like running along the Lake Front Trail in Chicago, running along Buffalo Bayou brought me close to nature in the heart of a major American city. It was a nice escape from the city. I know that as Houston recovers from Hurricane Harvey, Buffalo Bayou will be part of that recovery.

This pie's name captures its essence. It is gooey as a result of layers of deliciousness. Although none of the steps to make this pie are difficult, it does take some time. With a crust and then three layers each requiring time to cool, is not quick to make. But it is worth it. The only problem I had was that my pudding layer did not set enough, so it was not quite gooey enough. In the recipe below, I increased the amount of corn starch. I really liked the pecan crust, but if you have nut allergies, another type of crust, like chocolate cookie crumb crust, would work just as well.

Bayou Goo Pie

  • 1 cup flour
  • 2 Tbsp. sugar
  • 1 tsp. salt
  • 1/2 cup butter
  • 1 cup ground pecans
  • 8 oz. cream cheese
  • 1/2 cup powdered sugar
  • 1 tsp. vanilla
  • 3/4 cup sugar
  • 5 Tbsp. corn starch
  • 2 1/2 cups milk
  • 2 eggs
  • 2 Tbsp. butter
  • 2 tsp. vanilla
  • 4 oz. milk chocolate, chopped
  • whipped cream
  • chocolate shavings
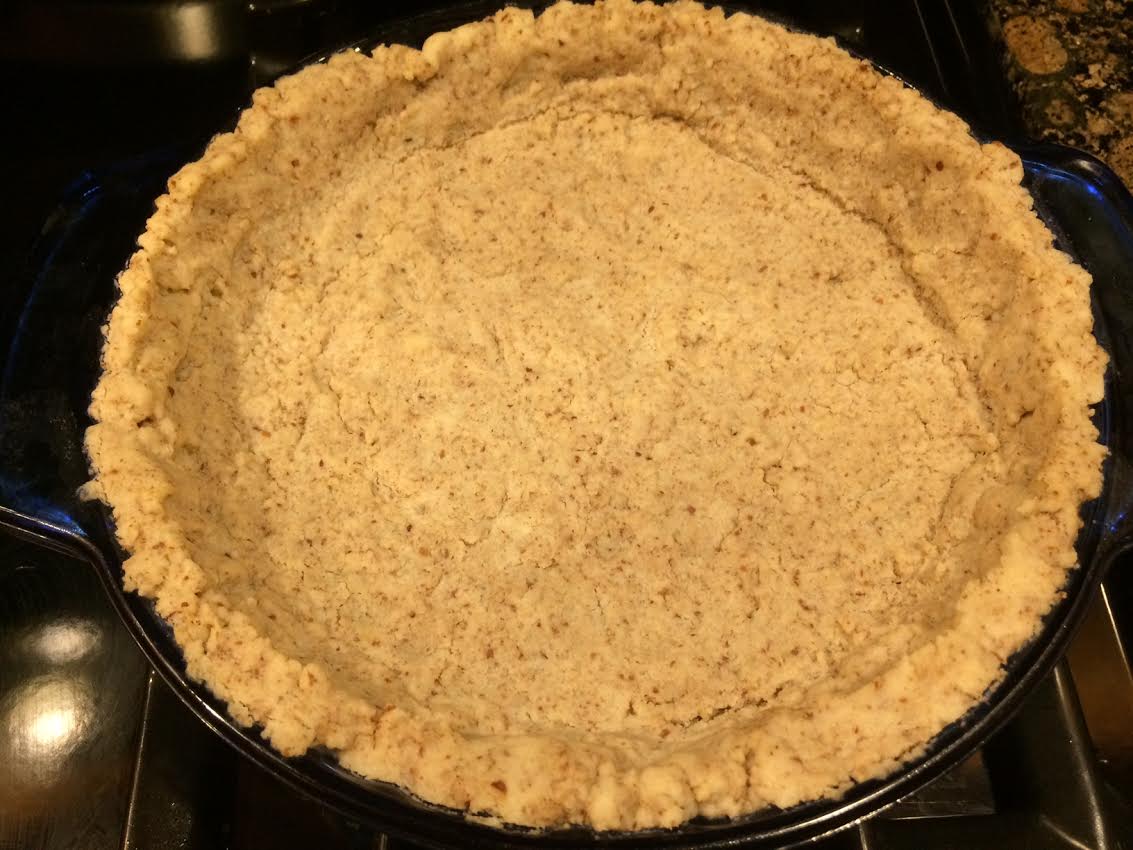
Crust: In a bowl, blend together flour, sugar, and salt. Cut in the butter until crumbles form. Mix in the pecans. Press the mixture into the bottom and sides of a pie pan. Bake at 350 for about 15 minutes. Allow to cool.

Sweetened Cream Cheese Layer: Soften the cream cheese in the microwave. Blend in the powdered sugar and one teaspoon of vanilla. Spread the mixture over the cooled crust. Refrigerate while preparing the next layer.

Pudding Layer: In a sauce pan, mix the sugar, corn starch, milk, and eggs. Cook over medium heat, frequently stirring, until the mixture thickens and is about to boil. Remove from heat and blend in the butter and two teaspoons of vanilla. Allow to cool for about 20 minutes. Add in the chopped chocolate (do not blend in the chocolate) and pour over the cream cheese layer. Refrigerate for at least five hours.

Whipped Cream Layer: Top the pie with whipped cream. Sprinkle with chocolate shavings. Enjoy!

Sunday, September 3, 2017

Spanish Noodles

When I found this recipe in Mom's recipe box, it seemed like something Mom likely made when we were young. After making it and tasting it, the dish seemed familiar, but I did not specifically recall when Mom made this recipe. But, I think I might add this recipe into my regular rotation. The best thing about this recipe is that everything is made in one pan on the stovetop, so even if it is a hot summer day, this recipe will not overheat the house.

I made just a few adjustments to this recipe. First, I used three times as much bacon as the recipe recommends. Mom's recipe called for two slices of bacon; I used six slices and could easily use more next time. Second, in addition to one of can of tomatoes, I used a few finely chopped fresh tomatoes from Mom's garden because she had recently given me so many. Although you could probably use any noodle, I recommend sticking with the fine egg noodles because that add a rich flavor. I also think you could easily add a seasoning or herb, such as cilantro or basil to add to the taste, but the recipe is quite delicious as is. I also ended up adding a little additional water because the noodle will soak up all the liquids as it cooks.

Spanish Noodles 
  • 6 slices bacon
  • 1 onion, chopped
  • 1 green bell pepper, chopped
  • 1/2 pound ground beef
  • 1 tsp. salt
  • 2 cans diced tomatoes
  • 8 oz. fine egg noodles
  • ground black pepper, to taste
Cut the bacon into one-inch pieces. Pan fry the bacon in a large skillet until crisp. Add the onion, green pepper, and ground beef; saute until beef is browned. Add undrained tomatoes and salt. Bring to a boil. Gradually stir in the uncooked noodles. Cook uncovered over low heat stirring occasionally until the noodles are tender. Add pepper to taste. Enjoy!


Saturday, August 19, 2017

Oatmeal Shakes

Although this blog is usually devoted to family recipes, I have on occasion posted re-creations of dishes that I have enjoyed, such as Drunken Cherry Cake. Recently, MDS and I discovered a local breakfast and lunch spot in our neighborhood called Tiztal Cafe. The food is delicious, but the place is really known for its oatmeal shakes. The basic shake is cinnamon, but you can also get it with various fruits.

I think this recipe is a good approximation of the oatmeal shake. I used almond milk, but any other type of milk or even water would be just fine. I love the almond milk with the cinnamon. I used a bit of plain greek yogurt to thicken the shake. Any type of yogurt could work, but the amount could be varied based on how thick you would like your shake. For one of these shakes, I added about half a banana. I preferred the shake with the banana, but MDS preferred the shake without banana. I also used my bullet mixer, so I was able to make each shake in a separate cup, but if you are using a standard blender, just multiply the ingredients as needed.

Oatmeal Shake 
  • 1/2 cup old fashioned oats
  • 1 cup almond milk
  • dash of cinnamon
  • 1/4 cup yogurt
  • 1/2 banana
In a blender, mix the oats, milk, and cinnamon. Refrigerate for a few hours or overnight. When you are ready to enjoy the shake, blend for about a minute. Add and blend yogurt and banana, until you reach your desired consistency. Enjoy!

Sunday, August 13, 2017

Tomato and Cucumber Salad

While I was growing up, Mom always had a small backyard garden. Although much of her current backyard is occupied by a trampoline for the grandkids, she still manages to keep a nice garden. Every year, she always has a lot of tomatoes. Her tomato plants usually produce lots of tomatoes from August through October. Lucky for me, Mom is happy to let me harvest vegetables from her garden. So far this year I have enjoyed tomato, zucchini, lettuce, and basil.

I wish I had taken a before photo of the tomatoes that I used for this recipe. One tomato was a perfectly shaped roma tomato. The other tomato so large and unusually shaped with some small blemishes that you could not find one like it in a store. But, just cut around the blemishes and there is delicious tomato waiting to be included in this salad. This recipe is quite adjustable to fit the amount of tomato and cucumber that you have available. Also, you can adjust the seasoning to suit your taste.

Tomato and Cucumber Salad
  • 1 large cucumber
  • 2 medium tomatoes
  • 2 Tbsp. olive oil
  • 1 Tbsp. red wine vinegar
  • 1 Tbsp. chopped mint
Chop the cucumber into one-half inch cubes. Lay out the cucumber in a strainer or on a paper towel. Sprinkle with salt to drain excess moisture from the cucumber for about 20 minutes. Meanwhile, chop the tomato into similar size pieces. Place the cucumber and tomato in a bowl. Toss with olive oil and red wine vinegar. Sprinkle with mint. Enjoy!

Sunday, August 6, 2017

Chocolate Pizzelles


Pizzelles are a great summertime cookie because they do not require the use of the oven. With so many possible flavor options, there is no end to the potential pizzelles that can be enjoyed. I have made standard vanilla and anise. I have even used pizzelles to make stroopwafel. Come back to this site in the future to see other flavors, such as coffee, chocolate mint, orange, among others.

I brought these chocolate pizzelles to Mom's for a standard Saturday night. They were delicious. In the picture to the left, Patrick is enjoying a pizzelle while Ava is having a cake pop that she made. The cake pops were an extra treat and they were delicious. Ava explained how she made them, so you may see cake pops on this site someday. Or, maybe I'll recruit Ava to be a guest blogger to post on cake pops. In the picture below, Jenny is enjoying a pizzelles.

Chocolate Pizzelles 
  • 3 eggs at room temperature
  • 3/4 cup plus 3 Tbsp. sugar
  • 1/2 cup butter, melted and cooled
  • 1 tsp. vanilla
  • 1 3/4 cup flour
  • 2 tsp. baking powder
  • 3 Tbsp. cocoa powder
In a large bowl, beat eggs and sugar. Add butter and vanilla. Blend in flour, baking powder, and cocoa powder. The batter will be stiff. Preheat the pizzelle iron. Drop batter by the spoonful into each pizzelle pattern. Close pizzelle iron and allow about bake about one minute. Remove the pizzelles with a spatula and allow to cool on a flat surface. Sprinkle pizzelles with powdered sugar. Enjoy!

Saturday, July 29, 2017

Deep Dark Chocolate Cake

For MDS's Birthday (still 39!), I made this cake. It was delicious. Although the recipe call for sprinkling it with confectioner's sugar, I decided to frost it with cream cheese frosting. Why should carrot cake get the best frosting? Chocolate cake deserves the cream cheese frosting, too. But, I am sure that this cake would be delicious with any frosting or confectioner's sugar.

I am sure Mom made this cake when I was young. True to its name, it is a deep dark chocolate taste. When I made this cake, I halved the recipe and used a 9X9 square pan with a shortened baking time. The recipe below makes a 13X9 inch pan cake or a layer cake. Because the cake was so good, I wish I had made the larger size so we would have more leftover cake.

Deep Dark Chocolate Cake 
  • 4 squares bakers chocolate
  • 1/4 cup butter
  • 2 cups sugar
  • 2 egg yolks
  • 1 3/4 cups milk
  • 2 cups flour
  • 3/4 tsp. salt
  • 1 tsp. vanilla
  • 1 tsp. baking soda
  • confectioner's sugar
Melt the chocolate and butter. Remove from heat and cool to room temperature. Add sugar and mix well. blend in the egg yolks and 1 cup of milk. Sift flour with salt; add to chocolate mixture. Mix until dry ingredients are just dampened. Beat for one minute at low speed with an electric mixer or 150 strokes by hand. Add vanilla and 1/2 cup more milk; mix until smooth. Dissolve soda in remaining 1/4 cup milk and quickly stir into batter. Pour into a paper lined 13X9 inch pan. Bake at 350 for about 45 minutes or until cake springs back. Cool. Sprinkle with confectioner's sugar or frost. Enjoy!


Sunday, July 23, 2017

Brown Sugar Nut Ring

Mom is a fan of coffee cakes, so I am not surprised to find recipes for various types of coffee cakes in her recipe box. I remember Mom making coffee cakes like this one, but I do not specifically recall this cake. A coffee cake is intended to be served with coffee or tea and is usually served with breakfast or brunch. But this tasty coffee cake is delicious any time of day. I made this ring to bring to a friend's house for brunch. But the resulting ring was much larger than I anticipated, I had to cut it into pieces to transport it. So of course MDS and I had to taste test it before to make sure it was safe to eat. It was, and, we had to force ourselves to stop eating it, otherwise there would have been none left for our friends.

The recipe uses yeast giving it more of a bread texture and flavor. The dough has eggs and more butter and sugar than most breads so the coffee cake is richer and sweeter than regular bread. I used a little more chopped pecans than the recipe called for and I wish I had used more, so I increased the amount in the recipe listing below.

Brown Sugar Nut Ring 
  • 1/2 cup milk
  • 1/2 cup butter
  • 1/2 cup sugar
  • 1/2 tsp. salt
  • 1 package yeast
  • 1/4 cup warm water (about 120 degrees)
  • 3 1/2 cups flour
  • 2 eggs, beaten
  • melted butter
  • 2/3 cup brown sugar
  • 2 tsp. cinnamon
  • 1/2 cup chopped pecans
  • About 2 cups cups confectioner's sugar
  • 1/2 tsp. vanilla
  • water
Scald milk. Add butter, sugar, and salt. Stir until sugar dissolves; cool to lukewarm. Dissolve yeast in water; combine with milk mixture. Stir in half the flour; add eggs and beat well. Add enough of the remaining flour to make soft dough. Turn out on lightly floured surface. Knead until smooth and elastic. Put in a greased bowl and turn over to coat. Cover and let rise until double in size, about one to two hours.

Turn out dough on a floured surface. Roll dough into a 8X12 rectangle. Brush with melted butter. Sprinkle with brown sugar, cinnamon, and nuts. Roll up like a jelly roll. Shape the roll into a ring on a greased baking sheet. From the outside, make cuts into the ring toward the center, about one inch apart. Turn each cut piece slightly to one side. Brush with butter. Let rise for about 45 minutes. Bake at 375 degrees for 20 to 30 minutes. While still warm, spread with thin confectioner's sugar frosting made from confectioner's sugar, vanilla, and water. Enjoy!