Saturday, December 28, 2013

Grandma's Italian Fig Cookies

Grandma made these fig cookies every Christmas. Mom remembers how much work went into these cookies, particularly grinding the figs. Luckily, Trader Joe's sells an excellent fig butter that eliminates the work of grinding figs with a hand grinder. Or, of course, you could just use a food processor, which is what I used to grind up the nuts. Nevertheless, there is a bit of work because the dough gets rolled out and cut up before the fig filling is added and then the final cookie is shaped. But eliminating having to grind figs is a major improvement. The dough is somewhat delicate, so I found it best to place the dough on the cookie sheet before adding the filling and shaping the cookie.

These fig cookies are also known as Cucidati and are very popular at Christmastime. While they can be found at Italian bakeries, nothing beats these homemade cookies. Grandma always made these cookies in a bow-tie-type shape. Other shapes could be used, but I stuck with the bow tie here. These cookies are not quite as sweet as other Christmas cookies, so adults might enjoy these cookies more than kids would.

Italian Fig Cookies

Filling
  • 2 pounds figs (or two jars of fig butter)
  • 1/2 pound raisins
  • 1/4 pound almonds
  • 1/4 pound walnuts
  • 1 tsp. cinnamon
  • 1/3 cup honey
  • 1/4 cup orange marmalade
  • Black coffee to moisten
Grind the figs and raisins (or use my shortcut method of opening a jar of fig butter). Toast and grind the nuts. Mix together the figs, raisins, nuts, cinnamon, honey and marmalade. Add black coffee as needed to moisten.

Cookie Dough
  • 3 cups flour
  • 3 1/2 teaspoons baking powder
  • 3 eggs
  • 3/4 cup sugar
  • 1/4 cup milk
  • 1/2 pound butter
In a separate bowl, blend the flour, baking powder, eggs, sugar, milk and butter.

Preheat oven to 400. To form the cookies, roll out the dough on a floured surface and cut into squares (about 2 inches by 2 inches). Add filling in a diagonal across the square. Fold the opposite corners and press together to seal the cookie.  Bake for about 15 minutes. Frost, if desired, with a basic powdered sugar glaze; or, dust with powdered sugar. Enjoy!

Saturday, December 21, 2013

Turtle Cookies

When I was young, every Christmas, Mom made these turtle cookies. I remember being put to work arranging the pecans to resemble the head and legs of a turtle before the cookie would be pushed onto the nuts. The cookies are intended to look like turtle candies. But they are definitely cookies.

While I can sometimes be picky about nuts in cookies and cakes, I always enjoy eating these Turtles. When I made this batch, I made a few cookies without nuts for my niece and nephew with nut allergies. The non-nut version were delicious, too. This recipe calls for maple flavoring, which I did not have on hand, so I substituted in some maple syrup and slightly reduced the sugar. I think the maple flavor in these cookies make them unique.

Turtle Cookies 
  • 1 1/2 cup flour
  • 1/4 tsp. baking soda
  • 1/4 tsp. salt
  • 1/2 cup butter or margarine
  • 1/2 cup packed brown sugar
  • 2 eggs, separated
  • 1/4 tsp. vanilla
  • 1/8 tsp. maple flavoring
  • Pecan halves
  • 2 squares of baking chocolate
  • 1/4 cup milk
  • 1 Tbsp. butter
  • 1 to 2 cups powdered sugar
Preheat oven to 350. Sift together the flour, baking soda and salt. In a separate bowl, blend together the butter and brown sugar. Add in one egg and one egg yolk (reserve the egg white). Blend in vanilla and maple seasoning.

On a greased baking sheet, arrange five split pecan halves, rounded side up, to resemble the head and legs of a turtle. Mold the dough into balls using rounded teaspoons of dough. Dip the bottom of the dough ball into the egg white and press into the arranged nuts. Bake for 10 to 12 minutes. Do not over bake. Cool completely.

To make the frosting, combine the chocolate, milk and butter in a small sauce pan. Heat over low until chocolate melts and is blended smooth. Remove from heat and add powdered sugar until frosting reaches proper consistency. Beat until smooth and glossy. Frost each cookie. Enjoy!

Candy Cane Cookies

I remember helping Mom make these cookies when I was a kid. Because there is some extra work involved in the assembly of these cookies, it is helpful to make them when there are kids around to help. Once the dough is mixed, kids can be put to work rolling then twisting the dough into the candy cane shapes. The process of making the cookies is just like making snakes out of play-dough. Next time I make these cookies, I might have to invite all the nieces and nephews over to do the serious work of shaping these cookies.

When I brought these cookies to Mom's on a Saturday night, Jenny mentioned that she made these cookies with almond extract, rather than mint extract. Of course, that would be a delicious modification. Whatever flavoring that you use, it should be a subtle, not overwhelming flavor. These cookies add a festive look to any Christmas cookie plate.

Candy Cane Cookies 
  • 1 cup sugar
  • 1 cup butter or margarine, softened
  • 1/2 cup milk
  • 1 tsp. vanilla
  • 1 tsp. peppermint extract
  • 1 egg
  • 3 1/2 cups flour
  • 1 tsp. baking powder
  • 1/4 tsp. salt
  • Red food coloring
Blend together sugar, butter, milk, vanilla, peppermint extract and egg in a large bowl. Stir in flour, baking powder and salt. Divide dough in half. Stir red food coloring into one half of the dough. Cover the dough and refrigerate at least 4 hours.

Preheat oven to 375. For each candy cane, shape one teaspoon of dough from each half into a three to four inch rope by rolling the dough back and forth on a floured surface. Twist together one red rope and one white rope. Place on an ungreased cookie sheet in the shape of a candy cane. Bake for 9 to 12 minutes. Allow to cool on a wire rack. Enjoy!

Sunday, November 24, 2013

Mashed Potatoes

Mashed Potatoes, while a common side dish for many meals, are mandatory for a complete Thanksgiving meal. Mom always made real mashed potatoes for Thanksgiving. Because mashed potatoes are so easy to make, there is no excuse for using boxed potato flakes.

Homemade mashed potatoes should be slightly lumpy, so don't worry about any lumps that might remain after mashing. Also, this recipe is very simple: potatoes, butter, and milk. It is easy to multiply to feed more or reduce down to a single serving. Decreasing the milk will result in stiffer mashed potatoes. Mom always peeled the potatoes, but sometimes a bit of peel adds a nice touch, so consider skipping the peel step or partially peel the potatoes. There are recipes that include fancier ingredients, such as, heavy cream, chicken stock, sour cream, or cream cheese. Those recipes are just fine, but Mom usually kept it simple.

Mashed Potatoes
  • 4 medium potatoes
  • 2-3 Tbsp. butter
  • 1/2 cup milk
  • salt and pepper to taste
Peel the potatoes and cut into 1-inch cubes. Place the potato cubes in pot and cover with water. Bring the potatoes to a boil, then reduce heat and cook for about 20 to 25 minutes, until the potatoes can be easily pierced with a fork. Drain the water from the potatoes and place the potatoes into a bowl.

Using a potato masher or a fork, begin to mash the potatoes. Then add the butter and continue to mash, until the potatoes are mostly mashed. Then add in milk and mix well. Use enough milk to obtain the desired consistency. Mix in salt and pepper to taste. Enjoy!

Sunday, November 17, 2013

Fried Rice

Mom loves Chinese food. When we were kids, ordering takeout from The Golden Wok was always a special treat. And, occasionally, Mom would make her own version of Chinese food.

Fried rice is an easy recipe that can be great for using up leftovers. You can throw any type of vegetable or meat into this dish. When I made this recipe, I used chicken leftover from a grocery store rotisserie chicken. Mom's recipe is a fairly basic recipe. With Thanksgiving coming up, turkey fried rice might be in my future. Mom's recipe just calls for bean sprouts, but other vegetables could be added in. In other words, this is a very flexible recipe.

Fried Rice
  • 2 eggs
  • 1/2 pound leftover beef, pork, chicken, ham, shrimp, or lobster 
  • 4 cups cooked rice
  • 1 can bean sprouts, drained
  • 1/4 cup soy sauce
Scramble the eggs and cook in a hot, greased skillet. Add in meat, rice, and vegetables. Cook about 5 minutes or until heated through. Add soy sauce to taste. Enjoy!

Sunday, November 10, 2013

Grandma Holmes's Caramel Cookie Bars

When I posted on Grandma Holmes's chocolate pie, MDS's sister Stephanie and cousin Chrissy immediately asked for information about Grandma Holmes's chocolate caramel bars. Luckily, Patti had the recipe, so now we can all enjoy these amazing bars. Now I understand why they inspire such devotion. If these bars were part of a Christmas cookie plate delivered to me, I would eat them first, especially to make sure that I got some before others dove in.

The recipe that Patti sent me calls for the use of a 9" x 13" pan. But I found that the recipe worked better with a 9" x 9" pan. For the caramels, I used a 9 ounce bag. It did take some time for the caramels to melt, but once they do melt, watch the caramels closely and stir frequently to avoid burning the caramel mixture.

Grandma Holmes's Caramel Cookie Bars 
  • 32 light caramels 
  • 2/3 cup evaporated milk 
Melt together in a saucepan over low heat, stirring often. This will take 15 - 20 minutes. While caramels melt, make the crust:
  • 1 cup flour 
  • 1/2 cup brown sugar 
  • Dash of salt 
  • 1/2 tsp. baking soda 
  • 3/4 cup rolled oats 
  • 3/4 cup butter 
  • 6 oz. chocolate chips
Mix dry ingredients. Cut in butter until coarse and crumbly. Reserve 1/2 cup of oatmeal mixture for topping. Press the rest into a greased 9" x 9" pan. Bake 12 minutes at 350 degrees. Sprinkle on 6 oz. chocolate chips. Spread on the caramel mixture. Sprinkle on the remaining oatmeal mixture. Put pan back in oven for 20 minutes. Refrigerate 2 hours before cutting into bars. Enjoy!

Saturday, October 26, 2013

Grandma Holmes's Lemon Squares

Lemon squares are a special treat, but so easy to make. And, although I have already made my Mom's version, here is Grandma Holmes's version. MDS has fond memories of his Grandma making and including these in her Christmas cookie plates. He especially likes how sweet these lemon squares are. From what I hear about Grandma Holmes, I am not surprised that these squares are especially sweet.

These Lemon Squares are particularly delicious and could be enjoyed any time of the year. It seems that these are commonly included on Christmas cookie plates as my Mom and Grandma Holmes included them on their plates, but don't save the Lemon Squares just for Christmastime; enjoy them anytime of year.

Lemon Squares
  • 2 1/4 cups flour
  • 1 cup butter or margarine
  • 1/2 cup powdered sugar
  • 4 eggs
  • 2 cups granulated sugar
  • 1/2 tsp. salt
  • 1/3 cup lemon juice
  • 1/2 tsp. baking powder
Preheat oven to 350. Cream together 2 cups flour, butter and powdered sugar. Press into a greased 9x13 pan. Bake for 15 minutes. Meanwhile, beat together the eggs, sugar, salt, and lemon juice. Beat in 1/4 cup flour and baking powder. Pour mixture over crust. Bake for 30 minutes. Sprinkle powdered sugar over the top. Loosen the edges with a knife. Allow to cool before cutting. Enjoy!

Sunday, October 20, 2013

Hamburger Casserole

This casserole recipe is very easy and makes a good-sized meal for a large family or lots of leftovers for a small family. In my case as a kid, Mom would make hamburger casserole to feed all seven of us. Now that it's just me and MDS, such a big meal would mean several days of leftovers.

While I like leftovers, after a few days, the same dinner over and over can lose its appeal. Luckily, our good friend Kal happened to stop by for dinner and happily enjoyed some of the leftovers with us. I recommend reheating this casserole in the oven, and, for that matter, it can easily be made ahead and stored in the refrigerator.

Many casseroles, like this one, are comfort foods. This one is fairly straightforward in terms of ingredients used and directions. In my opinion, the bread crumb topping is essential to give the casserole a contrasting crunchy topping. The next time that I make this casserole, I might even consider adding parsley to the topping.

Hamburger Casserole 
  • 1 1/2 pound ground beef
  • 1 cup chopped onion
  • 1 can condensed cream of mushroom soup
  • 1 can condensed cream of chicken soup
  • 1 cup sour cream
  • 1/4 tsp. pepper
  • 1 cup medium egg noodles, cooked
  • 3 tablespoons butter
  • 1 cup bread crumbs
Lightly brown the ground beef. Add in the onions and cook until tender, but not brown. Add in the soups, sour cream, and pepper. Mix well. Stir in the egg noodles. Pour the mixture into a 2 quart casserole dish.

Preheat the oven to 350. Mix together the butter and bread crumbs. Sprinkle on top of the casserole. Bake for 30 minutes or until hot. Enjoy!

Sunday, October 13, 2013

Pepperoni Rolls

Six years ago, in October 2007, MDS and I traveled to West Virginia to meet the PFT family. While in Clarksburg and Morgantown, we were treated to good company and excellent food. We had an amazing dinner at Julio's in Clarksburg. Then, we spent a beautiful Saturday in Morgantown watching the Mountaineers beat Mississippi State.

Tailgating at West Virginia University is unique. Having spent my undergraduate years at Illinois during a bleak time for its football program, I was not prepared for the WVU experience. In Morgantown, tailgating is a full day and night experience and may or may not include burning couches. And, most surprising to me, tailgating is even done during halftime. Yes, many fans leave the stadium during halftime to head to their tailgating location before returning inside for the second half. I am not sure that I had ever been to a sporting event with in and out privileges.

It was during this day of tailgating that I was introduced the the West Virginia delicacy: the pepperoni roll. The classic West Virginia version of sticks of pepperoni surrounded by soft bread could not be simpler. Just wrap a few sticks of pepperoni in bread dough and bake. But, in this case, the whole is greater than the sum of its parts. While baking, the fat from the pepperoni seeps into the bread; thus, turning bread and pepperoni into a pepperoni roll. The classic recipe calls for soft white bread to be formed into about a five-inch roll around the sticks of pepperoni. But, there are variations. For example, other types of bread could be used. I have made pepperoni rolls with semolina dough. If you are in a hurry, you could use refrigerated pizza dough or cans of crescent roll dough. At Freddy's in Cicero, Illinois, they make a pepperoni roll using a crusty bread. As for pepperoni, pre-sliced pepperoni also works well. Some folks add cheese. The size of the roll could be smaller, or larger, if you want. The origin of the pepperoni roll, much like the pasty, is in the need for coal miners to have an easy to eat lunch. Because the pepperoni roll is such an easy to take along and eat meal, it makes a for a great tailgate food.

Pepperoni Rolls
  • Dough
  • 8 ounces pepperoni
Prepare bread dough according to recipe until the point of forming the dough into the final shape. Divide the dough into small fist-shaped balls. Mom's bread recipe will yield about 8-10 rolls. Roll out the dough into a five inch circle until about a quarter to a half inch thick. Place pepperoni into the center and roll the dough around the pepperoni. Place the rolls, seam side down, onto a greased baking sheet. Allow the rolls to rise for about 30 minutes.

Preheat the oven to 350. Bake the rolls for about 20 to 25 minutes, or until the bread is done. Enjoy!

Saturday, September 28, 2013

Mushroom Steak

Here is another easy meal from Mom's recipe box. It might take a little too long to make on a weeknight, but it is delicious and filling. The ingredients are few and easy to come by. I bet this meal would be good using chicken instead of steak, but that is a test for another night.

For this dinner, I used egg noodles, but other types of noodles or rice could be nice. This recipe is a simpler variation of beef stroganoff, which is why I like egg noodles with it. Of the two recipes, I prefer the beef stroganoff, which uses fresh mushrooms. But when fresh mushrooms are not readily available, this recipe will do.

Mushroom Steak
  • 1/4 cup flour
  • dash of pepper to taste
  • 1.5 pounds round steak
  • 2 Tbsp. butter
  • 1 can cream of mushroom soup
  • 1/2 soup can of water
  • cooked noodles or rice
Cut the steak into inch cubes. Combine flour and pepper, then pound into steak with a meat hammer or edge of a heavy saucer. In a large skillet, melt the butter, then brown the steak on all sides. Add the soup and water. Cover and cook over low heat for 45 minutes, stirring occasionally. Serve over rice or noodles. Enjoy!

Monday, September 16, 2013

Patti's Meat Pie Pasties

MDS remembers his Mom making these Pasties when he was a kid. So, of course, I asked Patti for the recipe, which she gladly shared. Patti also provided some background information. The pasties are large hand pies and are often called "Cornish Pasties" because they were introduced in this country by the coal miners who emigrated here from Cornwall, England, to work in the mines of the Upper Peninsula of Michigan. Supposedly the wives would make the pasties in the early morning and the men would carry them tucked inside their shirts when they went to work in the cold weather. The pasty would keep the man warm, at least for a little while, and then the man's body heat would keep the pasty from freezing before lunchtime.

Patti's recipe differs from the traditional one in a couple of ways. The original calls for round steak cut into cubes, rather than ground. Patti thought that meat would be too tough, so she went with ground round. Patti's recipe leaves out rutabaga because the kids would not eat rutabaga. I can't help but wonder if they would even notice the rutabaga. Next time that I make these, I might try to sneak in some rutabaga.

Warning: Pasties are the type of food that retain heat, so Patti advises to have them out of the oven for about half an hour before dinner. You can really burn your mouth on these things if you don't let them cool for a while.

The recipe calls for pre-cooking the potato, but not the onion or carrot. Patti thinks that a step could be saved by using raw potato. But neither she nor I wanted to risk having the potatoes still crunchy in the finished product, so the hypothesis is untested. The carrot and onion get perfectly soft without pre-cooking. Patti remembers the family would love ketchup on pasties. MDS even vaguely remembers using ketchup. But maybe the ketchup is just for kids, because the pasties were delicious without ketchup.

Patti's Meat Pie Pasties

Crust:
  • 2 cups flour 
  • 1 tsp. salt 
  • 3/4 cup butter 
  • 5 to 6 Tbsp ice water 

Filling:
  • 1 lb. lean ground beef 
  • 4 small carrots, finely diced 
  • 1 medium onion, finely diced 
  • 4 small potatoes, boiled, peeled and chopped 
  • 3/4 tsp. dried thyme leaves 
  • 1 tsp. salt 
  • 1/4 tsp. pepper 

Make crust: Combine flour and salt in mixing bowl. Cut in the butter. Add water as needed. Use a pastry cutter to blend until the dough forms. Divide dough into four equal balls and chill for at least one hour.

Make filling: Combine all ingredients in a large bowl. Preheat oven to 400 degrees. Roll each ball of dough into a 9-inch circle. Place 1/4 of filling on one side of the circle, shaped into an oval mound. Fold over the other side of the dough to form a turnover. Seal the edges and press with the tines of a fork. Poke a few steam holes into each pasty with the fork. Bake for 45 minutes to an hour. If desired, brush with melted butter or egg wash. Allow about 30 minutes to cool. Enjoy!

Tuesday, September 3, 2013

John's Pasta Salad

A number of years ago, John first made this pasta salad for a family get-together, probably a Memorial Day or Labor Day party. Since that time, others in the family have made this recipe, each adding their own favorite add-ins. Laura likes to add garbanzo beans. The great thing about this recipe is that once you make the basic recipe, you can easily add in any combination of vegetables, cheese, meats, etc. As Laura says, it is a great recipe for using up any veggies that you have sitting around.

Now this recipe will feed a crowd, but could easily be reduced to feed fewer than a crowd. The key ratio for the sour cream to mayo is 1:1. John prefers to use more mayo and sour cream, but it is entirely up to your taste. Other than balancing the sour cream to mayo, the amount of other ingredients is entirely up to you. When I made this recipe, I used everything listed below.

John's Pasta Salad
  • 1 16 ounce bag or box of pasta (elbow or rotini work best)
  • 1-1/2 cup mayo
  • 1-1/2 cup sour cream
  • 2 packets dry Italian dressing
  • 2-6 cups chopped veggies, such as cucumber, carrot, tomato, celery, etc.
Optional add-ins, to taste:
  • Cheese, cubed 
  • Diced ham or salami (or other meat)
  • Black Olives, sliced
  • Can of Garbanzo beans, drained and rinsed 
  • Bottled Italian Dressing, to taste
Cook the pasta. Cool the pasta. Mix the mayo and sour cream with dry Italian. Add the mixture to the pasta. Add cheese, meat and veggies. Stir in. Depending on the veggies, more sour cream and mayo (using a 1:1 ration) may be mixed in. If it is too dry, add some bottled Italian dressing. Chill for several hours. Enjoy!

Tuesday, August 20, 2013

Grandma's Fried Green Tomatoes

When late summer rolls around, a bounty of vegetables begins to arrive. When looking through Grandma's recipes, I found this one for fried green tomatoes. Although I do not remember Grandma making these, I bet she did. I am glad that I decided to give them a try. These fried green tomatoes were outstanding.

Now, you may find other recipes for fried green tomatoes that require more steps. For example, I saw one recipe that called for dredging the tomatoes in flour, then coating in a beaten egg, then dredging them through seasoned corn meal. There is nothing wrong with taking all those steps. But I plan to stick with the simplicity of Grandma's recipe. The only change I recommend from grandma's recipe is to use salt on the sliced tomatoes to draw out some of the excess water.

This year, Mom has a bumper crop of tomatoes in her backyard. I was lucky to already receive two lovely ripe tomatoes. They were delicious. As the tomatoes continue to grow, I hope to get more tomatoes from Mom, maybe even some green tomatoes.

Fried Green Tomatoes 
  • 2 medium green tomatoes
  • 1/4 cup flour
  • 1 Tbsp. sugar
  • 1/2 tsp. salt
  • 1/4 tsp. pepper
  • 2 Tbsp. butter or olive oil
Slice the tomatoes into 1/4 inch slices. Set in a colander and sprinkle with salt and allow excess water to drain for about 20 minutes. Meanwhile, mix the flour, salt, pepper on a piece of wax paper or in a shallow bowl. Coat the tomatoes with the flour mixture.

Heat the butter or olive oil in a large skillet over medium heat. Add the tomatoes in a single layer and cook about four minutes per side or until the tomatoes are lightly brown and barely tender. Repeat as necessary with remaining tomato slices. Enjoy!

Grandma included a note that if green tomatoes are gone, use firm red tomatoes. I will have to give red tomatoes a try some time. 

Tuesday, August 13, 2013

Aunt Paula's Blueberry Coffee Cake

A few summers ago, MDS and I picked several pounds of blueberries while we were in Michigan. Lucky for us, Aunt Paula gave us this excellent recipe to use up some of the blueberries. For some reason, this recipe shouts summer to me, but maybe this winter, I will give it a try with frozen blueberries.

Aunt Paula and Uncle Zach graciously host us when we visit Michigan. The photo here of MDS with Aunt Paula and Uncle Zach was taken around MDS's birthday in 2011. We always have a great time staying with the Holmes, which usually involves a fair amount of wine and delicious food.

Aunt Paula's recipe notes that this coffee cake freezes well. I imagine that it might, but I have never had to freeze it. The entire coffee cake disappears within days anytime I make it.

Aunt Paula's Blueberry Coffee Cake 
  • 1 cup butter
  • 2 1/4 cups sugar, divided
  • 2 eggs
  • 1 cup sour cream
  • 1/2 tsp. vanilla
  • 2 cups flour
  • 1 1/2 tsp. baking powder
  • 1/4 tsp. salt
  • 2 cups blueberries (fresh or frozen)
Cream butter and 2 cups of sugar, then add eggs and beat again. Fold in sour cream and vanilla. Add flour, baking powder and salt. Pour batter into a greased 9X13 pan. Arrange blueberries evenly over the batter then sprinkle 1/4 cup sugar over the top. Bake at 350 for 35 minutes.

Glaze
  • 3 Tbsp. melted butter
  • 1 Tbsp. milk
  • 1 cup powdered sugar (approximately)
Mix the milk and butter together. Begin adding the sugar a little at a time until glaze thickens and can be easily drizzled. When the cake has cooled, drizzle the cake with the glaze. Enjoy!

Tuesday, August 6, 2013

Grandma's Stuffed Peppers

I have a number of Grandma's recipes cards, but as you can see, she knew her recipes so well, that she did not write much information on her cards: She would simply write "Italian cheese," "parsley" and "garlic" without specifying how much. You might notice that the bottom of the recipe card says "over," but the other side just contains an alternative of using bread crumbs -- probably instead of the rice, but the card does not say so. As I made this recipe, I did some research to fill in the details. It turns out that this recipe likely came from Betty Crocker (or, maybe Betty Crocker took it from Grandma). I have included a more complete recipe below that I hope will help you make this recipe.

These stuffed peppers are easy to make and a delicious, filling meal. As Grandma's own recipe card has an alternative, this recipe could be modified by using Italian sausage, turkey sausage, or other meat. Other herbs instead of parsley could be used. The best part of this recipe is that it is hard to go wrong.

Grandma's Stuffed Peppers
  • 4 large bell peppers
  • 1 pound ground beef
  • 1/2 cup finely chopped onion
  • 2 Tbsp. parsley
  • 1 Tbsp. minced garlic 
  • 1 cup cooked rice
  • 2 8-ounce cans tomato sauce
  • 1 egg
  • Italian cheese (optional)
Prepare the peppers by removing the top of each pepper and cleaning out the seeds and membranes. Soften the peppers by cooking them. Option 1: Place the peppers in a large sauce pan and cover with water, bring to boil and cook for two minutes, then drain. Option 2: place the peppers in an microwavable dish, add a little water then cover with plastic wrap; then, microwave for 2-3 minutes.

In a skillet, brown the beef. Add in the onion, parsley, garlic, 1 can tomato sauce, and rice. Turn off the heat and mix in the egg. Mix in cheese (such as parmesan or mozzarella), if desired.

Preheat oven to 350. Stand the peppers upright in a casserole. Fill each pepper with the meat mixture. Pour remaining can of tomato sauce over the peppers. Cover with foil tightly and bake for 10 minutes. Uncover and bake for 15 minutes. Top with cheese. Enjoy!

Sunday, July 28, 2013

Rum Cake

Mom and Grandma both made this rum cake, but it had been many years since I tasted it, and I had never made it before. I don't know why I waited so long to try out this cake. It is delicious.

As the name indicates, rum is a key ingredient. Mom says that she used to use imitation rum extract. I used the real thing. Either way, the cake tastes great. The recipe uses instant pudding, which helps make the cake so moist. The other ingredients are basic. As for the tube pan, I actually used a bundt pan. Either type of pan could work.

I made this cake for MDS in advance of his birthday. I left out the pecans because, although MDS likes nuts, he prefers no nuts in baked goods. Rum cake makes a great birthday cake. MDS's birthday is two days before Grandma's birthday. If Grandma were still with us, I am sure she would love to have a slice of this cake.

Rum Cake

  • 1 package yellow cake mix
  • 1 package instant vanilla pudding
  • 4 eggs
  • 1/2 cup cooking oil
  • 1/2 cup water
  • 1/2 cup rum
  • 1/2 cup finely chopped pecans
For the Glaze:
  • 1 cup butter
  • 1 cup sugar
  • 1/4 cup water
  • 1 ounce rum
Mix together the cake mix, pudding, eggs, oil, water, and rum. Arrange the pecans on the bottom of a greased tube pan. Pour the batter into the pan. Bake at 325 for one hour. Just before the cake is done, mix together the ingredients for the glaze in a sauce pan and boil for one minute. Remove the cake from the oven and pierce the top thoroughly with a toothpick. Immediately pour the glaze all over the top of the cake. Cool completely before removing the cake from the pan. Enjoy!


Wednesday, July 10, 2013

Pepper Steak

This recipe is very easy to make, but does take a little longer than some of Mom's other weeknight meals. Nevertheless, you should definitely consider adding it into your rotation of meals. There are only a few ingredients, and they are always easy to find.

I remember Mom making pepper steak with some regularity when we were young. I don't remember anyone objecting to it, and with seven potentially picky eaters, no complaints must mean it was popular.

Pepper Steak
  • 1 1/2  boneless chuck steak
  • 2 Tbsp. olive oil
  • 1 envelope onion soup mix
  • water
  • 2 green bell peppers
  • 1 1/2 Tbsp. cornstarch
  • cooked rice
Cut the meat into thin strips about two inches long. In a large skillet, heat the olive oil and brown the meat, turning frequently. Stir in the onion soup mix and two cups of water. Cover and simmer for 30 minutes. Meanwhile, clean and cut the peppers into thin strips. Add the pepper to the skillet and cook for about 10 more minutes. Blend the cornstarch and 1/2 cup water. Stir the cornstarch into the skillet. Cook for a few more minutes, until the sauce has thickened. Serve over rice. Enjoy! 

Friday, July 5, 2013

Pizzelles

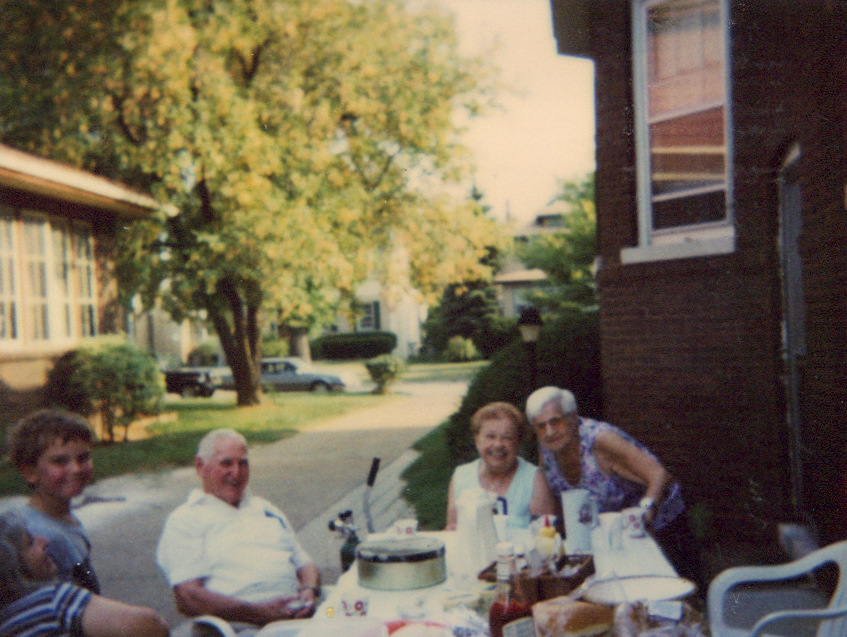
When we were young, Grandma and Grandpa often hosted Memorial Day and Labor Day get togethers. They often invited their friends, Rose and Red. To the left is a photo from Grandma and Grandpa's house in Chicago, featuring (from left to right) Grandpa, Rose, Grandma, Noah, Mom and Megan. Below is a photo from the house on Addison in Riverside, featuring Mom, Mike, Red, Rose and Grandma. Usually, Rose would bring her homemade pizzelles, a delicious Italian waffle cookie. Rose often made anise-flavored pizzelles, a traditional Italian flavor.

Pizzelle means little pizza and the name comes from the round shape. When fresh off the iron, pizzelles are soft and pliable and can be shaped into ice cream cones, mini-bowls or cannoli shells. After a few minutes, the cookie hardens and becomes firm and crispy.

In order to make pizzelles, you need to have a pizzelle iron or press. The modern electric pizzelle irons look a lot like waffle irons, but result in thin cookies. The old pizzelle irons were designed to be used over an open fire or on the stove top. Most pizzelle irons have a waffle pattern on one side and flower pattern on the other side.

Once you made the base batter, any flavoring can be added. Flavoring includes vanilla, almond extract, anise, lemon and orange. For chocolate flavor, add three tablespoons of cocoa powder. For coffee flavor, dissolve a tablespoon or two of instant coffee with the melted butter. When making almond pizzelles, I like to use both almond extract and chopped almonds in the batter. For the recent Fourth of July family party, I even made chocolate almond pizzelles, which were quite tasty. I have not made pistacchio pizzelles, but I may try those next time. At the end of this post, there is a photo of Tim enjoying a pizzelle from my latest batch at Mom's new place in North Riverside.

Pizzelles


  • 3 eggs, room temperature
  • 3/4 cup sugar
  • 1/2 cup butter, melted and cooled
  • 2 tsp. vanilla (or other extract)
  • 1 3/4 cup flour
  • 2 tsp. baking powder
  • optional: crushed nuts, cocoa powder, etc.
In a large mixing bowl, beat the eggs and sugar. Add the cooled butter and desired flavorings. Sift in the flour and baking powder into the egg mixture. The batter should be stiff enough to drop by spoon. 

Heat up the electric pizzelle iron. Drop a teaspoon of batter onto each grid pattern and close the pizzelle iron. The pizzelles will be ready in about one minute. Remove the pizzelle with tongs and allow to cool on a flat surface for flat pizzelles or immediately shape. Dust with powdered sugar. Enjoy!


Sunday, June 23, 2013

Grandma Holmes's LBJ Brownies


UPDATE: After publishing this post, my Mother-in-Law Patti sent me a photocopy of the recipe that she had clipped from the Detroit News in June or July 1966. It turns out that Grandma Holmes got the recipe from Patti. The recipe was created by LBJ's daughter, Luci Baines Johnson. Patti recommends baking the brownies at 325 for 40 to 45 minutes to prevent the edges from getting too brown.

Who knew that LBJ liked brownies? MDS has read the entire Robert Caro biography (all four volumes, to date) of Lyndon Baines Johnson, but does not recall a single reference to brownies. But MDS's Grandma Holmes did have a recipe for "LBJ Brownies" that appears to be copied from a newspaper. And, a Google search revealed the exact recipe under the name "Mrs. LBJ's Brownies." I suspect that the recipe was published in a newspaper during an election season. Could Grandma Holmes have anticipated that her grandson would read over 3,200 pages about LBJ? Probably not. But, her grandson does like brownies, as do I, so this recipe was a hit.

When I made the recipe, I left out the nuts. Now, I like nuts and I like brownies, but I have never liked nuts in my brownies. I have no good explanation, but to me, nuts have always spoiled good brownies. With or without nuts, this recipe is guaranteed to be delicious.

LBJ Brownies
  • 1/2 pound butter (2 sticks)
  • 1 cup sugar
  • 3 squares unsweetened chocolate
  • 2 eggs
  • 1 cup chopped pecans (optional)
  • 3/4 cup flour
  • 1 tsp. vanilla
Melt the butter in a sauce pan; while it is melting, put the sugar in a mixing bowl. Add about 3/4 of the melted butter to the sugar. To the rest of the butter, add the chocolate squares and stir often on low heat to melt the chocolate. Add the chocolate mixture to the butter and sugar mixture. Beat in the eggs one ata time. Stir in the nuts, flour and vanilla.

Bake in a greased 8X8X2 pan at 375 for 20-25 minutes. Do not get too done; test with a finger or straw. Cool and cut into squares. Enjoy!

Thursday, June 20, 2013

Beef Stroganoff

What I remember most about Mom's beef stroganoff is that she always served it with egg noodles. When I found Mom's recipe, it stated that it could be served with rice or noodles. To me, beef stroganoff should always be served with egg noodles. Mom's recipe also called from ground beef. Again, I am sure that ground beef would be just fine, but Mom always used round steak, and so did I.

In doing a Google search, it turns out that beef stroganoff is Russian in origin and has been around and in recipe books for quite some time. There are variations, but the key ingredients are beef, mushrooms, onion, and sour cream. If you don't have dry mustard, your could easily substitute any prepared mustard. You could also use canned mushrooms instead of fresh mushrooms. It had been years since I had had beef stroganoff, but it tasted just as I remembered it.

Beef Stroganoff
  • 1 pound round steak
  • 1 cup chopped onion
  • 8 oz. fresh mushroom, sliced
  • 1/2 tsp. garlic salt
  • 1/2 tsp. dry mustard
  • 1/2 cup mayonnaise
  • 1/2 cup sour cream
  • 1/2 cup beef stock
  • cooked egg noodles
Slice or cube the steak. Saute the first five ingredients in a skillet until the beef is browned and the onion is tender. Combine the mayonnaise, sour cream and beef stock, then stir it into the meat mixture. Cook over low heat for 10 to 15 minutes. Serve over the cooked noodles. Enjoy!

Sunday, June 9, 2013

Crab Rangoon Dip

In looking through Mom's recipes, I found one for Crab Rangoon. Now, I don't actually remember Mom making Crab Rangoon, but my very own Crab Rangoon Dip has become a popular appetizer at our family Easter get-togethers. Crab Rangoon is a deep fried appetizer filled with cream cheese and crab. I have no interest in actually deep frying anything, so I just make the filling and serve it as a dip with crackers and pretzels. Mom's Crab Rangoon recipe is just about the same as mine, but does call for using wontons and deep frying these tasty treats. I take the easy way out and make a dip.

MDS claims not to like cheese, but he loves Crab Rangoon Dip. When I tell him that the main ingredient is cheese, he just claims that the main ingredients are crab and "rangoon." What is "rangoon"? I haven't the slightest idea. I doubt that this recipe has any connection to Rangoon, the former capital of Burma, because it seems to be an American creation. As to the ingredients, I typically do not closely measure the ingredients, so the amounts below are approximate.

Crab Rangoon Dip


  • 8 oz. cream cheese
  • 4 oz. crab, finely chopped
  • 4 green onions, chopped
  • 1 Tbsp. Worcestershire sauce
  • 1 tsp. soy sauce
  • 1 tsp. celery salt
  • 1/2 tsp. garlic powder
Soften the cream cheese so that it can be easily mixed (about 30 seconds in the microwave). Mix in the remaining ingredients. Serve with crackers, pretzels or vegetables. Enjoy!

Wednesday, May 29, 2013

Sauerkraut Cake with Mocha Whipped Cream Frosting

As I have mentioned before, Mom often did not inform us kids of the actual name of the dish or of certain ingredients in the recipe. She knew that we would not even try something if we thought it was weird. It could only take one of us to reject a dish before the rest of us might not even try it. I don't blame Mom; sometimes ignorance is bliss. While celebrating a lovely Mother's Day recently, we all enjoyed the delicious Portillo's chocolate cake.  As we were talking about how good the cake was, someone mentioned that the secret ingredient that made it so moist was mayonnaise. A quick google search will confirm that everyone talks about how good the Portillo's cake is and that the secret is mayonnaise. Then, Mom mentioned that she used to make a chocolate cake with sauerkraut. Everyone was shocked, but I had seen the recipe in Mom's recipe box, so I knew of the recipe. I didn't realize, however, that I had eaten it.

When Memorial Day came around, I told Mom that I would make the sauerkraut cake, but that we shouldn't tell anyone what was in it. So we just said that it was chocolate cake with mocha whipped cream frosting (which is specifically called for on Mom's recipe card). Some folks remembered the conversation from Mother's Day and were able to guess what was in it. But everyone who tried the cake liked it. This Memorial Day, Kal joined our family get-together and, as you can see, he enjoyed the cake. The sauerkraut adds texture and moisture to the cake. But, you would never guess that the secret ingredient was sauerkraut.

Sauerkraut Cake

  • 2/3 cup butter
  • 1 1/2 cup sugar
  • 3 eggs
  • 1 tsp. vanilla
  • 2 1/4 cup flour
  • 1/2 cup unsweetened cocoa
  • 1 tsp. baking powder
  • 1 tsp. baking soda
  • 1/4 tsp. salt
  • 1 cup water
  • 2/3 thoroughly rinsed sauerkraut
Cream the butter and sugar until light and fluffy. Beat in eggs, one at a time until well-blended. Add vanilla. In a separate bowl, sift together the flour, cocoa, baking powder, baking soda, and salt. Add flour mixture alternately with water into the egg mixture and blend well. After rinsing the sauerkraut, finely chop it, then add it into the cake mix and blend well.

Pour batter into a greased and floured 9x13 pan. Bake at 350 for 30 minutes or until cake tests done. Allow to cool before frosting.

Mocha Whipped Cream Frosting
  • 1 1/2 cup whipping cream
  • 3 Tbsp. powdered sugar
  • 1 Tbsp. instant coffee
  • 2 tsp. cocoa
  • 1 tsp. vanilla
Whip the cream until starting to stiffen. Add the remaining ingredients and blend until soft peaks form. Frost the cake. Enjoy!