Another mainstay of Mom's annual Christmas cookie plates was the mint patties. But us kids always called them toothpaste cookies because they are minty like toothpaste and their soft consistency is a bit like toothpaste. But that is where the similarity ends because these mint patties are loaded with sugar. Maybe that is why I always loved these tasty treats.
Now, these mint patties are technically not cookies because there is no need to actually bake them. They are like the inside of a Junior Mint, just without the chocolate. They are simple to make, but do require some time after they are made to dry out. The dough itself reminds me of Play-Doh because it is so easy to shape, such that you could make them into any type of shape, and use multiple food colors to create patterns or shapes. Here, I followed what Mom always did and made the patties using the tines of a fork to make a pattern.
No Cook Mint Patties
4 Tbsp. butter, softened
1/3 cup light corn syrup
1 tsp. peppermint extract
1/2 tsp. salt
4 3/4 cup powdered sugar
food coloring
Thoroughly blend the butter, corn syrup, peppermint extract, and salt. Add the sugar and mix with a spoon and/or hands until blended. If you want to have different color patties, divide the dough now. Add 1 or more drops of food coloring and blend until you have the desired color.
Shape about one tablespoon of dough into a round ball. Place on wax paper and flatten using the tines of a fork. Let the patties to dry for several hours. Enjoy!
I remember Mom making kolacky cookies at Christmastime. The kolacky is a Czech cookie, and has several spellings. I pronounce it "Klotch-key."
The cookie has several variations, so I should not have been surprised when I looked in Mom's recipe box and found four different recipes for kolacky cookies. When asked, Mom immediately said that she always made the cream cheese kolackys, so that is the recipe here. As for the filling, any sort of fruit preserve will work, so pick your favorite. Mom's recipe calls for adding a little lemon or almond extract to the preserves, creating a nice flavor overall for the cookie.
There are several ways to form the cookies. I remember Mom using the thumbprint method, in which the rolled dough is cut with a round cutter, then using your thumb, make a small indention in the center for the preserves. Another method involves one more step of pulling together opposite sides and pinching the dough to form something of a basket for the preserves. Another option is to use a two-inch round base, with preserves in the center, then a top, also two inches, but with another circle of one inch removed from the center so the preserves peek through. Still another option is to use the thumbprint method, but then fold the unbaked cookie in half and press the edges with a fork to seal. No matter how you form the kolackys, they will be delicious.
Kolacky Cookies
1/2 cup butter
1 package cream cheese
1 tsp. sugar
1 cup flour
Filling options
1/2 cup apricot preserves + 1/2 tsp. lemon extract; OR
1/2 cup strawberry preserves + 1/2 tsp almond extract
Beat the butter and cream cheese until smooth. Blend in the sugar, then the flour. Roll out the dough to 1/16 inch thick. Cut into desired shape and place onto baking sheet. Place rounded 1/4 tsp. of filling in the center of each cookie. Form shape of cookie, as desired (see note above). Bake at 375 for 8 minutes. Dust with powdered sugar. Enjoy!
With another December comes another Christmas cookie recipe. Although this recipe is technically for a bar rather than a cookie, Mom used to make these for her annual cookie plates that she gives out at Christmastime. These lemon bars make a great addition to a plate full of cookies, or can be anytime on their own. MDS's Grandma also used to make lemon bars to be included on her cookie plates. Clearly lemon bars are a Christmas classic.
Lemon bars are very easy to make. Be certain to thoroughly grease the pan. When Mom made these, if the bars did not come out cleanly, those broken bars were for us kids to eat. So, of course we loved the fact that they were difficult to remove. But next time I make lemon bars, I will likely use parchment paper to line the pan to make it easier to remove the bars. When I made this recipe, I did not have any lemon flavoring, so I just use a little extra lemon juice. They were still so tasty.
Lemon Bars
1 cup plus 2 Tbsp. flour
1/2 cup butter or margarine, softened
1/4 cup powdered sugar
2 eggs, beaten
2 Tbsp. lemon juice
1 cup white sugar
1/2 tsp. baking powder
1/2 tsp. lemon flavoring
Spray and 8X8 baking pan with cooking spray. Mix together 1 cup flour with the butter and powdered sugar. Pat the mixture into the pan, using a spatula. Be sure to evenly spread the mixture. Bake at 350 for 15 minutes.
Meanwhile, combine the eggs, 2 tablespoons flour, white sugar, baking powder and lemon flavoring. Pour onto the baked crust. Bake for 25 minutes. Optional: sprinkle with powdered sugar. Allow to cool, then cut into bars. Enjoy!
After Thanksgiving, there are always tasty leftovers to be enjoyed, like turkey sandwiches or curry turkey. My favorite leftover is the turkey frame soup that Mom always made.
It's called turkey "frame" soup because it starts by boiling the entire frame of your Thanksgiving turkey in a big pot. (This year our turkey was bigger than our pot, so I had to get MDS to break the turkey's carcass in half.) By the time you're starting the soup you've already cut off the big pieces of meat for Thanksgiving dinner and set aside more meat for turkey sandwiches, but as Carl Weathers once said, there's still plenty of meat on that bone. So you'll end up with a very meaty soup.
There are many variations to this soup. In the recipe below, I have added a can of diced tomato that Mom does not use. When used in conjunction with oregano, it makes it more of an Italian soup. If you prefer, instead of oregano, you could use basil, majoram, or thyme. As for the vegetables, Mom usually used a frozen "soup mix," which is what I used. You could use any standard soup vegetables, fresh or frozen, such as celery, carrots, parsnips, onions, broccoli, or any other vegetable. This recipe makes a lot of soup, so I usually freeze some, because, just as you can get sick of turkey leftovers, you can get sick of turkey soup leftovers.
Turkey Frame Soup
1 meaty turkey frame
2 cups chopped, cooked turkey
1 16 oz. can diced tomatoes
1 Tbsp. chicken bouillon granules
1 1/2 tsp. dried oregano
1/4 tsp. black pepper
3 cups soup vegetables
1 1/2 cup medium noodles
Break the turkey frame in half and place it is a large Dutch oven. Add water to cover. Bring to a boil and then reduce the heat. Cover and simmer for about two hours.
Remove the turkey frame. When the frame is cool enough to handle, cut the meat off the bones and coarsely chop. Add additional meat to equal about 2 cups, and set meat aside. Strain the broth through a sieve lined with 2 layers of cheesecloth; discard any solids.
Return the broth to the Dutch oven. Stir in the undrained tomatoes, bouillon, herb, pepper, and vegetables. Return to boiling then reduce heat. Cover and simmer for 15 minutes. Stir in noodles and turkey. Simmer 8 to 10 minutes more or until noodles are done. Enjoy!
Can you have Thanksgiving dinner without green bean casserole? Some families do it, but in our family something would be missing from Thanksgiving if green bean casserole wasn't on the menu. Mom's recipe for this casserole is fairly standard. And, of course it is very easy to make. I could not find this recipe among Mom's written recipe, but she was able to rattle off the ingredients without even pausing. You could use fresh green beans, if you want. But this recipe was perfectly designed for canned green beans.
What truly makes this dish special is the french fried onions. Some get mixed into the casserole and some are left on top to get super crunchy. I know this recipe calls for 2 cups, but I actually used more than two cups when I made this recipe. This dish could be made anytime of year, but for whatever reason it has become a Thanksgiving classic, that, in my family is saved for that one time each year.
Green Bean Casserole
1 can (10 3/4 oz.) condensed cream of mushroom soup
1/2 cup milk
dash of salt and pepper (to taste)
2 cans (14 1/2 oz.) canned green beans, drained
2 cups french fried onions
Heat oven to 350. In a bowl, mix together the soup, milk, salt, pepper, green beans and 1 cup french fried onions in a 1.5 quart casserole dish. Bake for 25 minutes, until the mixture is hot and bubbling. Stir the mixture. Then, top with the remaining french fried onions. Bake 5 more minutes. Enjoy!
My mother-in-law recently shared with me a favorite recipe: Pastitsio. Patti explained that they had first tried the dish at a church fair at a Greek Orthodox Church in Urbana, Illinois in the late 1960s. And, as it happens, the local newspaper published the recipe a week later. Lucky for us that Patti found that recipe and shared it.
Pastitsio is a baked pasta dish. As Patti explained, it is very easy to make, but the downside is that it uses every pan in the kitchen. To me, all that cleanup is worth it for this tasty meal.
This recipe is the standard Greek version of the dish. Other variations might use lamb or veal instead of beef, or, other spices, such as allspice. But, I stuck to Patti's recipe here. You cannot go wrong with this recipe, and do not skip the cinnamon or nutmeg. As Patti says, they make the recipe. Patti also suggested that the dish can be prepared in advanced, and even frozen, just to be defrosted and baked when you are ready to serve it.
Pastitsio
Meat Filling:
1 lb. ground beef
1 small onion, chopped
8 oz. tomato sauce
1/2 tsp. salt
1/4 tsp. pepper
1/4 tsp. cinnamon
8 oz. elbow macaroni (about 2 cups raw), cooked according to package directions. Do not overcook. Drain and add 3 oz. grated Romano cheese.
For topping: 1/4 tsp. nutmeg
In a large skillet, brown beef with onion until no longer pink. Drain fat. Add salt, pepper, tomato sauce and cinnamon. Simmer until quite dry. Remove from heat and set aside.
In a saucepan over medium heat, melt the butter and stir in flour. Stir in the milk gradually and heat to boiling. Add the seasonings.
Beat the eggs in a bowl. Gradually add a bit of the hot cream sauce, then return eggs to to the remaining sauce in the pan, and stir thoroughly.
Stir 1/4 of the cream sauce into the macaroni/cheese mixture.
Heat oven to 375 degrees. Spray an 8" square baking pan and spread half of the macaroni mixture into the bottom. Top with all of the meat sauce, then all of the remaining macaroni. Pour the remaining white sauce over all and sprinkle with the nutmeg. Bake uncovered for 1 hour. Let stand 15 minutes before cutting into squares and serving.
Serves 4 - 6. Enjoy!
Every Halloween when we were kids, we would carve pumpkins. Each of us would have our own pumpkin, so we could design our individual jack-o-lantern. Carving a pumpkin is actually hard work. This year, MDS had carving duty. And each time a knife is stuck into a pumpkin, I am reminded of the Peanuts' character, Linus, as he cries out to Lucy, "You didn't tell me you were going to kill it!" in the Halloween classic, It's the Great Pumpkin, Charlie Brown.
As a result of all the pumpkin carving, there were loads pumpkin seeds that Mom would collect, clean and toast in the oven. Mom usually just sprinkled a little salt on them. This year, I got a little more adventurous and sprinkled the seeds with sugar and cinnamon. I must admit that I left them in the oven just a little too long, such that the seeds became a bit too caramelized, but they were still tasty.
Toasted Pumpkin Seeds
Seeds from one pumpkin
2 Tbsp. butter, melted
1/2 tsp. salt
Any seasoning, if desired
Clean the pumpkin seeds. Spread the seeds on a cookie sheet. Drizzle with the melted butter. Sprinkle on the seasoning. (Note: for the cinnamon sugar seeds, I blended 1/2 tsp. cinnamon and 1 Tbsp. sugar with the butter before drizzling).
Bake at 350 for 20-25 minutes. About halfway through the cooking time, stir the seeds to allow even toasting. Enjoy!
Above is MDS carving a pumpkin this year; below is MDS and his sister and dad carving a pumpkin in 1978:
Every Halloween, MDS's Grandma made popcorn balls that she put into special treat bags for MDS, his sister Stephanie, and cousins Zach and Chrissy. The treat bags also included full-size Snickers and Milky Ways, jawbreakers, Nerds, and loads of other candy.
I wish I had known Grandma Holmes. She was a pioneering woman in politics in Michigan. When her husband died, Grandma Holmes, with two young kids to care for, took over her husband's position as Plymouth Township Treasurer. Thus, began her twenty year political career. She was well-known and well-liked throughout her community. But, the stories about Grandma Holmes that make me laugh are the stories about her sweet tooth. I can certainty relate to her love of cookies, cake and ice cream.
MDS was not there when Grandma Holmes made the popcorn balls, but Patti remembers her Mom making these when she was a kid. The difficulty in making these popcorn balls is just how hot the sugar mix will get. There is a very short time window when the sugar-coated popcorn is cool enough to handle, but not yet set. I managed to make this recipe without burning my hands with the sugar mixture, but I did have close calls.
Popcorn Balls
9 cups plain popped popcorn
1 cup sugar
1/3 cup light corn syrup
1/3 cup water
1 tsp. distilled white vinegar
1 tsp. salt
4 Tbsp. unsalted butter
1/2 tsp. vanilla
Coat a large heat-proof bowl with cooking spray and place popcorn in the bowl.
In a medium saucepan, combine sugar, corn syrup, water, vinegar, and salt over high heat. Stir until sugar is dissolved, about 2 minutes. Bring to a boil and cook until the mixture registers 260 F on a candy thermometer, about 7 minutes. Remove from heat and stir in the butter and vanilla until the sugar mixture is smooth.
Immediately drizzle the sugar mixture over the popcorn, stirring continuously with a rubber spatula. Be sure to scrape the bottom of the bowl, where the sugar mixture may tend to pool. With buttered hands, tightly press the popcorn mixture into balls. Place on wax paper to cool, about 15 minutes. This recipe will yield about 18 small popcorn balls or 8 medium popcorn balls. Enjoy!
Here is another recipe that uses the gravy from this blog's name, the namesake recipe, spaghetti pie, and lasagna. Mom usually made this pizza bread when there was leftover gravy from a Saturday night dinner. In my house, we never have any gravy because it is a certain someone's favorite dish. So I when I made the gravy for this recipe, I had to keep that someone away until after I used what was needed in the pizza bread. Depending upon the size of the bread loaf that you use, you will probably need about 1/3 of the gravy recipe here.
For the loaf of bread, Mom would often just use a standard french loaf. For this recipe, I prefer a chewier bread instead of a crusty bread. Mom usually bought a block of mozzarella and sliced it. You could use shredded mozzarella, but by slicing the mozzarella by hand, the slices are typically thicker. When using leftover gravy, this recipe makes an easy weeknight dinner. Now, if only I ever had leftover gravy.
Prepare the gravy using the standard recipe. You can make the gravy in advance, if needed. Spread the gravy on the open face of the bread. Top with mozzarella cheese. Sprinkle with grated parmesan. Bake in an oven preheated to 350 for about 20-25 minutes, or until cheese is melted. If you prefer, use the broiler function for about five minutes to brown the cheese. Enjoy!
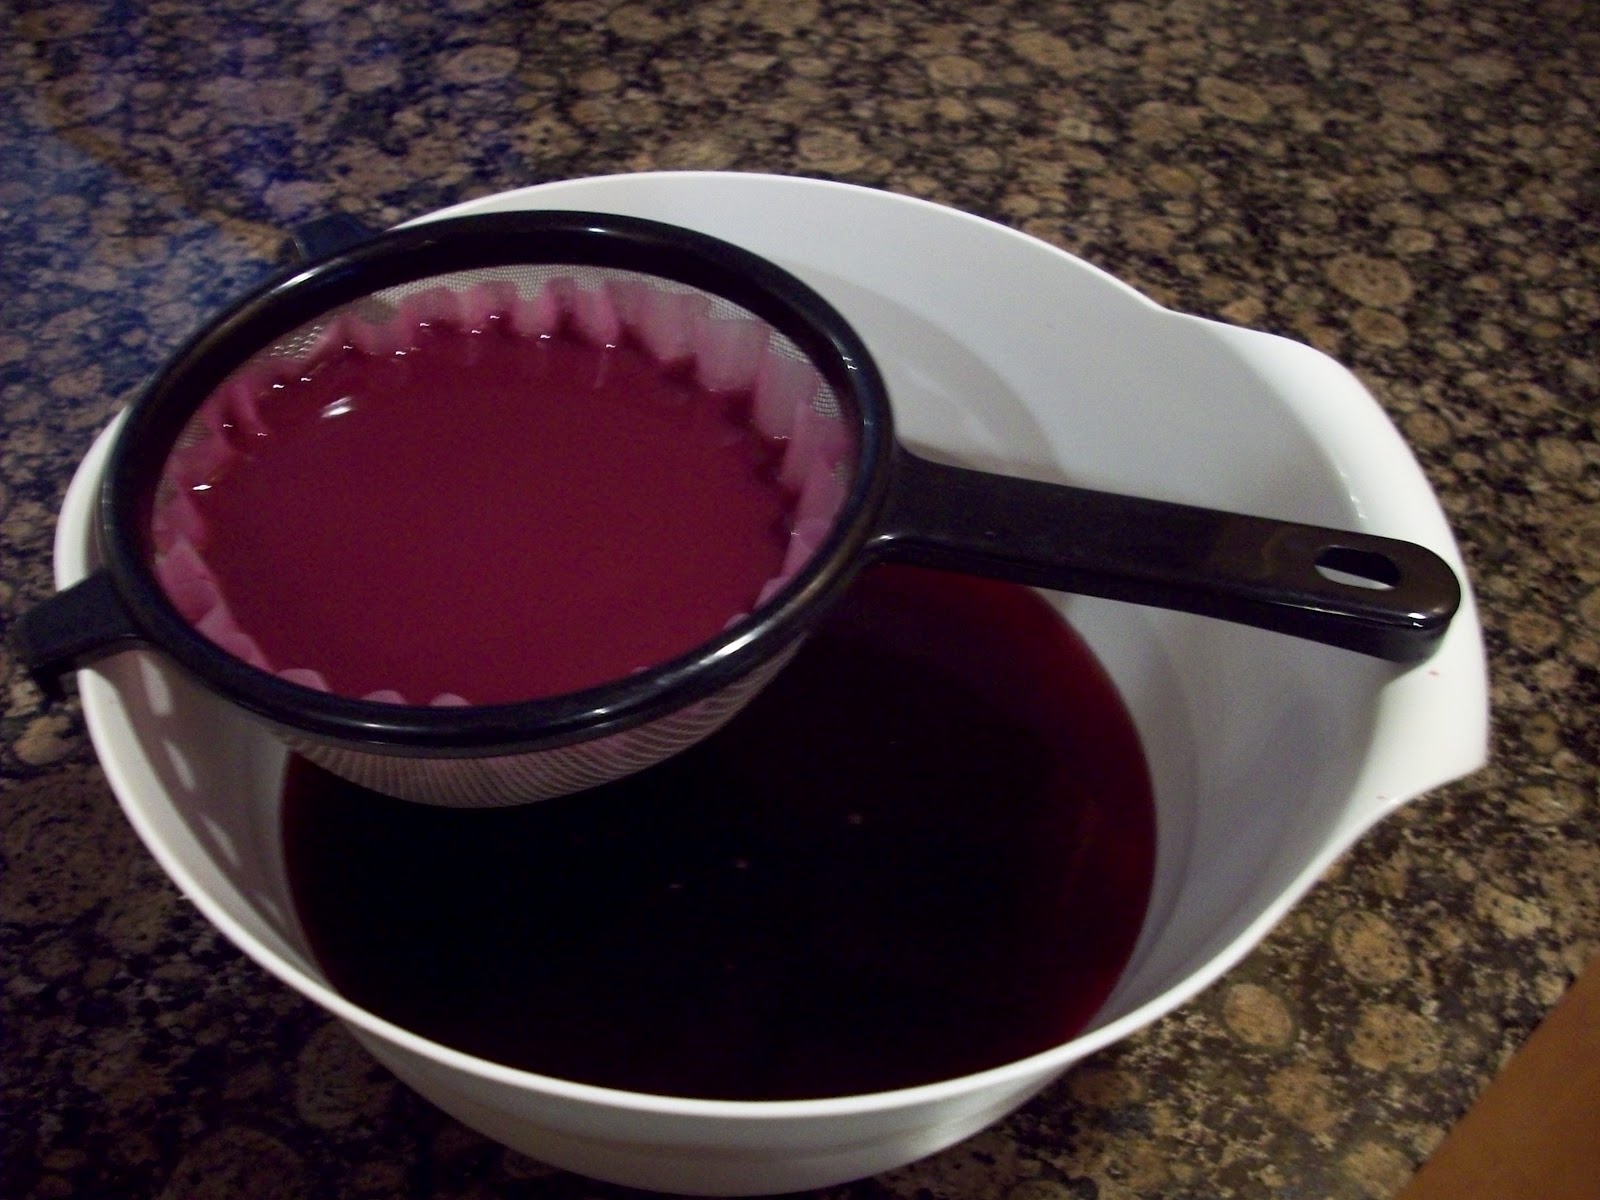
The title of this post is real--this recipe is for homemade wine. Mom told me that when all us kids were young, Mom and Dad did not keep alcohol around the house, except for an occasional batch of this wine. I am sure that all my siblings remember the Dad making this wine. It is hard to forget the gallon jug with a balloon on top sitting around for weeks. When we lived on Lincoln, Dad would usually put the jug in the basement near the washer and dryer.
This wine takes time to make, about three weeks. When I made a batch for this post, I used a half-gallon jug because I wanted to use a glass jug and that size is what I had on hand. I simply halved the recipe. You could use any type of jug, such as a milk jug. The wine itself was not bad, and maybe even good. MDS asked me whether it was a merlot or a cabernet, but I told him it was concord. As in concord frozen grape juice concentrate. There is no French appellation for this wine. In researching tips on homemade wine, I read that any flavor frozen juice concentrate could be used. Next time, I will try peach juice frozen concentrate. Also, I used just regular yeast and it turned out fine. But, there are different types of yeast meant for winemaking that allegedly yield better wine. The wine tasted fine to me and was pretty sweet, so I did not need to add extra sugar. All in all, homemade wine was a success.
Homemade Wine
2 12-oz. cans of frozen grape juice concentrate, thawed
3 cups sugar
1 tsp. dry yeast dissolved
water
gallon jug
balloon
Pour the juice concentrate and sugar into a gallon jug. Add the yeast to one cup warm water (about 115 degrees) with a spoonful of sugar. After the yeast has foamed, add the yeast mix to the gallon jug. Fill the jug with water. Make a pinhole in the tip of a balloon and place the balloon over the spout of the jug. The balloon will inflate a bit as the yeast works. When the balloon deflates (about three weeks), the wine is ready.
The sediment will sink to the bottom. Pour the clear wine out and remove the sediment. You could also pour the wine through a filter (I used a coffee filter and sieve). You may add an additional cup of sugar to sweeten to taste. Enjoy!
Growing up, ordering in Chinese food or actually going to our favorite place, Golden Wok, was a special treat. Perhaps because it was what I grew up with, the Golden Wok is still my gold standard for Chinese food. While I have since learned that Golden Wok serves the typical Americanized Chinese food, I still love it.
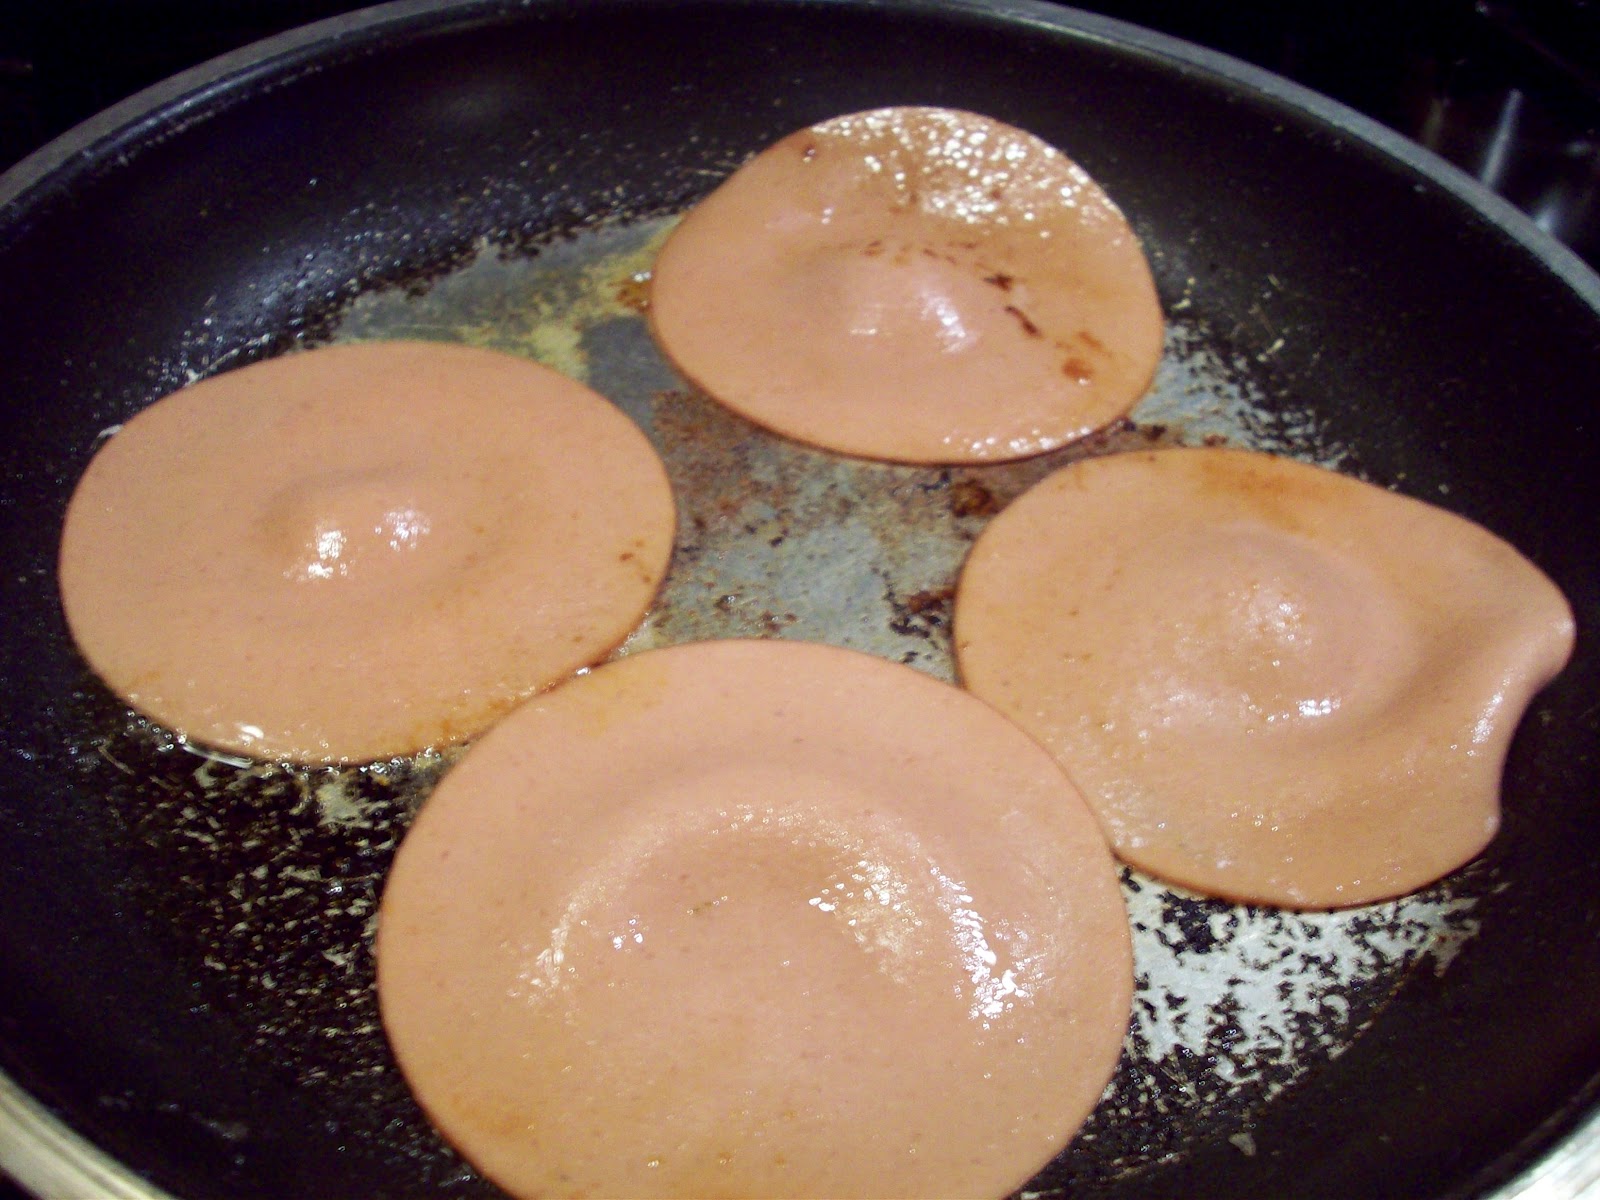
Every now and then, Mom would actually make homemade Egg Foo Young. Until now, I had never tried to make it myself. Of course, it is essentially an omelet, so it is quite simple. Egg Foo Young is easy to adjust to whatever ingredients you have handy. You can use any cooked meat, such as pork, beef, or chicken. Mom usually added mini-shrimp. The other classic ingredients include sliced water chestnuts, bamboo shoots, bean sprouts, sliced cabbage, mushrooms, and garlic.
Of course, what makes Egg Foo Young special is the brown sauce that is typically served with the dish. I recall that the Egg Foo Young from Golden Wok came drenched in the brown sauce. I served this Egg Foo Young on a bed of brown rice to help soak up the brown sauce. Egg Foo Young can be served with or without rice or noodles, or other accompaniment, but don't serve it without the brown sauce.
Egg Foo Young
6 eggs, beaten
1/2 cup chopped onion
8 oz. can water chestnuts, drained and sliced
8 oz. can bamboo shoots, drained and chopped
1 Tbsp. chopped garlic
salt and pepper to taste
In a bowl, mix together the ingredients. Spray a frying pan with cooking spray or coat with oil. Heat the pan on medium. Spoon about 1/2 cup of the egg mixture onto the frying pan. Cook until brown and then flip and cook the second side until brown. Repeat until all the egg mixture is used.
Egg Foo Young Brown Sauce
1 Tbsp. butter
2 Tbsp. cornstarch
1 tsp. sugar
1 1/2 cups cold water
2 Tbsp. soy sauce
Melt the butter in a small sauce pan over low heat. Then, blend in the cornstarch and sugar. Gradually stir in the cold water and soy sauce. Cook and stir until thickened.
Serve the Egg Foo Young with the brown sauce. Enjoy!
Mom usually made this cheese ball for big family parties. This recipe is easy and should be made in advance. It can last in the frige for a while and it can even be frozen.
Mom recently hosted the family for Labor Day. Just the day before, I was flipping through Mom's recipe box when I came across this gem. It has been years since I have tasted this cheese ball, but it tastes just as I remember. Mom and I are pictured here enjoying the cheese ball before anyone else had even arrived at the party.
Mom usually used nuts with this recipe to coat the cheese ball, but the recipe states that you could use parsley or paprika instead. I used almonds when I made this cheese ball because I like almonds and had some around the house. Mom seems to think that she used walnuts, but any nut would work. Mom also remembered using parsley and paprika, so I will have to try those another time.
Cheese Ball
1 package (8 oz.) cream cheese, softened
1 jar (4.5 oz.) mushrooms
1 Tbsp. dried minced onion
1 Tbsp. Worcestershire sauce
1/2 cup chopped nuts
Drain and finely chop the mushrooms. Mix the cream cheese, mushrooms, onion and sauce. Chill for about one hour. Form the cheese into a ball and roll in the nuts. Serve with crackers. Enjoy!
Yes, you read that title correctly. Mom occasionally made these simple sandwiches for dinner. Really, there is no need for a recipe. Simply fry up some bologna in a frying pan and serve on bread. In my memory, Mom always made the sandwiches with basic white sandwich bread. I remember putting a slice of processed American cheese and mayo on my sandwich. I used thin sliced bologna for these sandwiches, but I seem to recall the bologna being thicker in my childhood than what I found in the grocery store this week. I used classic beef bologna, but I saw turkey, pork and chicken bologna at the store. You could use any type of bread, toasted or untoasted. Of course, there are many potential condiments--consider mayo, ketchup, mustard, pickles or even barbecue sauce. You could even make these sandwiches super fancy by adding lettuce and tomato. There is nothing to stop you from turning a simple bologna sandwich into a masterpiece.
These sandwiches are good even for picky eaters, like MDS, who like the sandwich in spite of himself. He was skeptical, but, ultimately admitted that he enjoyed his sandwich, which he had on toasted bread with mustard. In fact, MDS observed that the sandwich would be better with even more bologna on it. So, next time I make these sandwiches, I will make them with extra bologna.
Fried Bologna Sandwiches
Bologna (3-5 slices per sandwich)
sliced bread
cheese
condiments
Spray a frying pan with cooking spray. Heat pan with medium heat. Place a layer of bologna in the pan and cook for 3 to 5 minutes per side, or longer, if you prefer.
Place the fried bologna on bread, add condiments or other toppings. Enjoy!
Whenever Mom made broccoli, she made it with this cheese sauce. I suppose covering broccoli with cheese was Mom's way to get us to eat vegetables. It worked for me because now I love broccoli even without cheese sauce.
MDS, who often claims to dislike cheese, even liked this broccoli with cheese sauce. So I guess that proves that Mom's cheese sauce tastes good to just about everyone.
Recently, when talking with Mom and Megan about this dish, Mom seemed to think that she used her imitation hollandaise sauce with broccoli. But, Meg and I clearly remember that Mom always used this cheese sauce with broccoli and her imitation hollandaise sauce with cauliflower. Nevertheless, this cheese sauce would be tasty with any vegetable. And, stay tuned for cauliflower with imitation hollandaise sauce, which will appear in a future post.
Broccoli with Cheese Sauce
1-pound broccoli
2 Tbsp. butter
2 Tbsp. flour
2 Tbsp. milk
4 slices American cheese
To prepare the broccoli, cut the broccoli into spears. Add broccoli to boiling water. Cook for about 8 to 10 minutes. Drain and rinse with cold water. Place the broccoli in a casserole.
While the broccoli is cooking, make the cheese sauce, by melting the butter in a small sauce pan over low heat. Whisk in the flour. Continue stirring the flour and butter. Add in the milk and blend together. Allow to cook for a few minutes. Then slowly add in the cheese until melted.
Pour the cheese sauce over the broccoli. Bake at 350 for 15 to 20 minutes. Enjoy!
Mom occasionally varied her recipes to try to make them healthier. A prime example is Mom's wheat pizza. The recipe is the same as regular pizza, just substituting wheat flour for regular flour. Wheat flour has more nutrients and fiber. For this recipe, I used only wheat flour, but you could also use half wheat flour and half regular flour, or any combination of the two flours.
I know certain siblings were not fans of wheat pizza. As for me, I really like it. The wheat flour gives the pizza a nice flavor that is distinct from standard pizza. You can get standard pizza at just about any pizzeria, but I do not recall seeing wheat pizza on any pizzeria menu. To enjoy wheat pizza, give this recipe a try.
Just as with the regular pizza, Mom usually just used rectangular cookie sheets, so that is what I used here. Although, I do vaguely remember that for a time, Mom did have a round pizza pan. But any kind of pan will work just fine.
Wheat Pizza
(yields 2 pizzas)
1 package active dry yeast
1 cup warm water (110 degrees)
2-3 cups wheat flour
2 tbsp. olive oil
1 tsp. salt
2 tsp. sugar
Sauce (16 ounces of tomato sauce seasoned with garlic and oregano)
2-3 cups mozzarella cheese
toppings such as cooked sausage (about one pound), veggies, etc.
grated parmesan cheese
Dissolve yeast in the warm water and let stand for about 10 minutes until foamy. Combine flour, olive oil, salt, sugar, and yeast mixture in a large bowl. Stir well until the dough comes together and is stiff. Add additional flour, if needed. Cover dough and allow to rise until dough has doubled, about 1 to 2 hours. When the dough is almost done rising, cook any of the toppings (such as sausage) that need to be cooked. Turn out dough on floured surface and form into pizza crusts. Grease the pans and sprinkle with semolina flour. Place dough into pans and create a slight edge with the dough.
Cover the dough with sauce, toppings and mozzarella cheese. Sprinkle pizza with grated parmesan cheese. Bake at 375 for 25 minutes, or until pizza is golden. Enjoy!
When I was in fourth grade, Mom's parents moved in with us. Grandma and Grandpa had their own "in-law" apartment in our house, but we still spent a lot of time with them, especially hanging out on the front porch. I feel lucky to have grown up and spent so much time with Grandma and Grandpa. Today, July 31, would have been Grandma's 94th birthday. In her memory, here is a terrific cake straight from Grandma's recipe box. This blog will still focus on Mom's recipes, but there are a number of other family recipes that deserve to be here. I know that you will enjoy this one.
Grandma had a serious sweet tooth, which I definitely inherited from her. She made this cake often and so did Mom. The recipe is quite simple. For this post, I used grated carrots, but pumpkin could just as easily be used. Now, when I gave Mom a piece of this cake, she was disappointed that there were no nuts in the cake. Grandma regularly used nuts in the cake. While I like nuts, I usually do not like nuts in cake. And, as you can see from Grandma's own handwritten recipe, you can add nuts if you want. Grandma's recipes were typically direct and without full explanation of the steps. But, also, there is no need to follow a strict recipe; the cake will come out just fine no matter the method used to mix the ingredients together. Use a bundt pan, or as Grandma noted, a tube pan. Also, the recipe for the frosting is not written on the recipe here, but Grandma used the cream cheese frosting recipe noted below for this cake (whether carrot or pumpkin).
Carrot or Pumpkin Cake
3 cups flour
2 tsp. baking soda
5 tsp. baking powder
1 tsp. salt
2 tsp. cinnamon
2 cups sugar
1 ½ cup oil
4 eggs
2 cups pumpkin or grated carrot
Add nuts if you want
Mix together all the ingredients. Bake in 350 over 25 to 30 minutes in a bundt pan.
Cream cheese frosting
Cream cheese, softened
1 tsp vanilla
2-3 cups powdered sugar
milk to thicken
Blend all ingredients until smooth. Frost cake after it has fully cooled. Enjoy!
For over a year now, I have been regularly preparing, taste-testing, and posting about Mom's classic recipes. And, while I will continue to post Mom's recipes, I will also now expand to post other family favorites. Feel free to send me ideas.
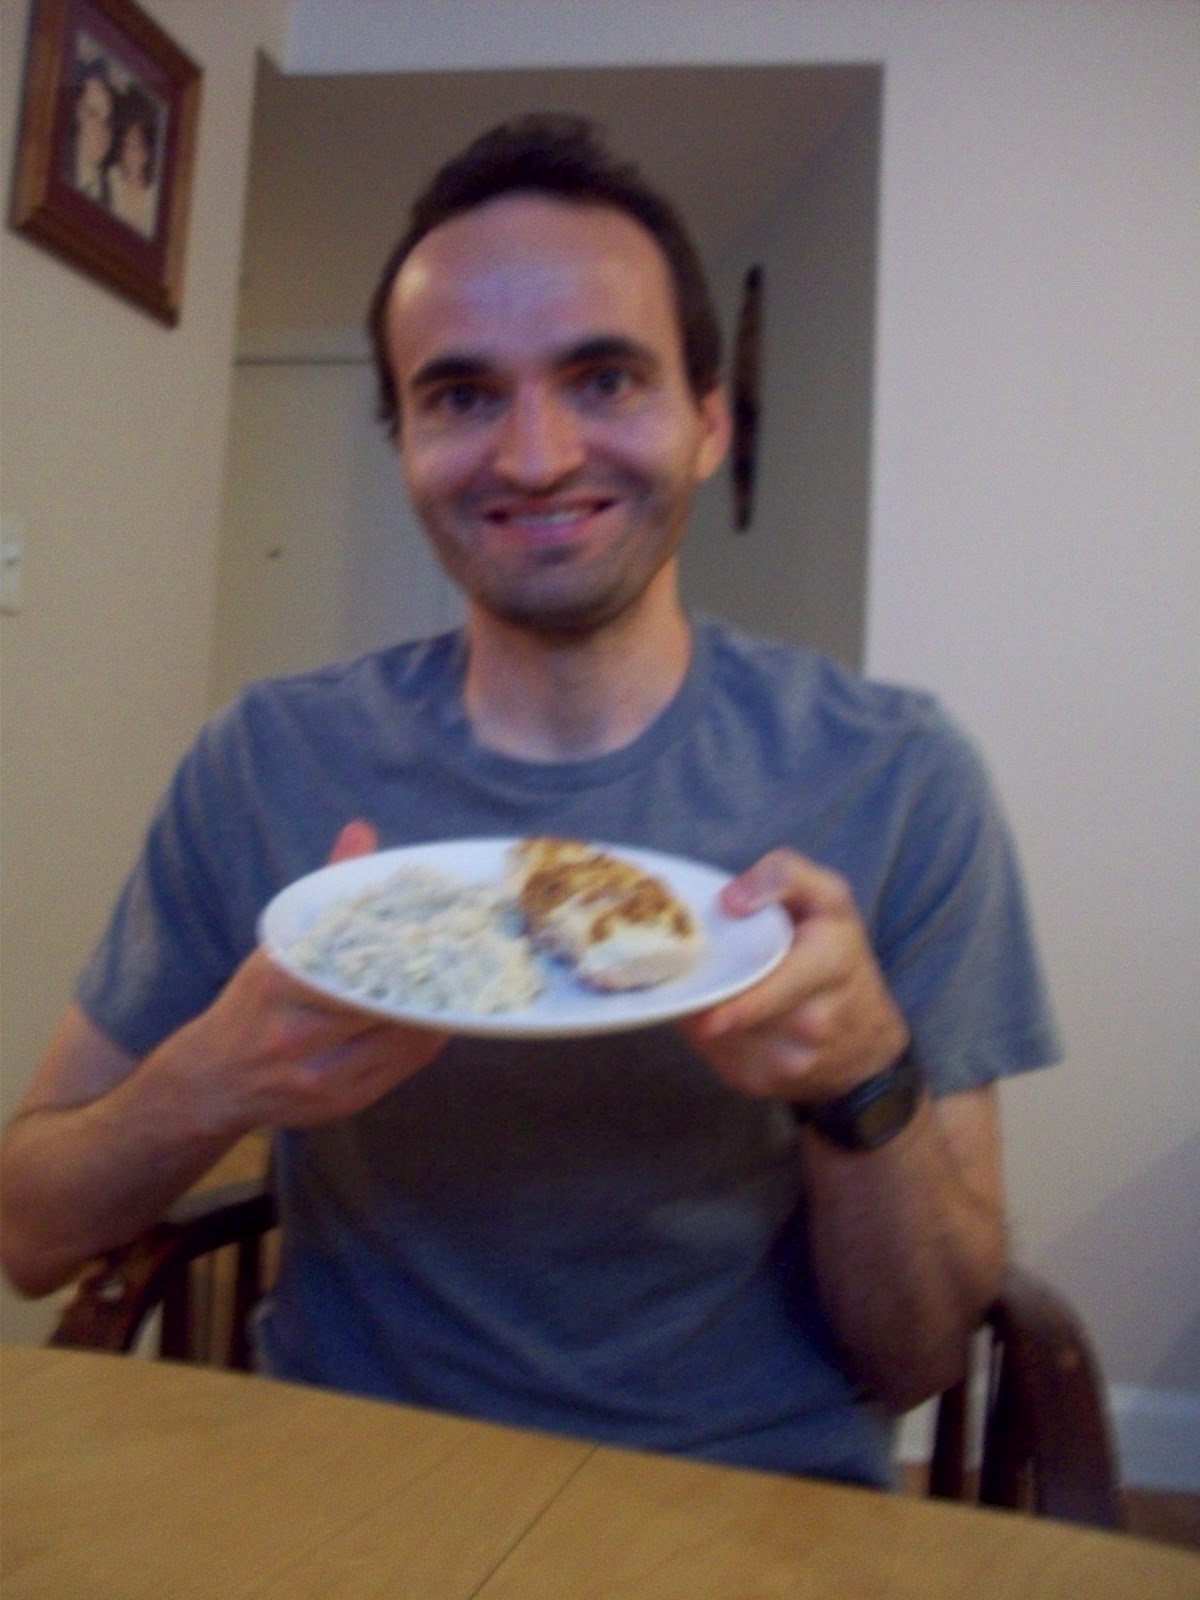
This first expansion recipe is a Smith family classic. Since the age of eight, MDS has had this chicken dish for his birthday dinner. In honor of his birthday today, I now present to you Patti's Mock Chicken Cordon Bleu, a tasty recipe from my mother-in-law. This recipe will feed a crowd, or better yet, make for terrific leftovers.
The recipe is quite simple, but I do have a few tips that may be helpful. The recipe calls for dried beef. I find it difficult to locate dried beef, so I often use Carl Buddig beef lunch meat. I use an entire one-pound package of bacon. Also, I use a pint of sour cream, so that there is extra sauce for extra rice.
This recipe has it all--chicken, bacon and beef. But the chicken is the star and always comes out very tender. I think it is the combination of being cooked in bacon and sauce. I typically use six large chicken breast which seem to just barely fit in the pan. But some of the chicken breasts are so large, that they could easily feed two people or one very hungry birthday boy.
Mock Chicken Cordon Bleu
6 skinless, boneless chicken breasts
12 slices of bacon
1 jar dried beef (2.4 - 4 oz.)
1 can cream of mushroom soup
1 cup sour cream or plain yogurt
cooked rice (about 4 cups)
Spray a 9x13 pan with cooking spray. Chop the beef into small pieces and scatter the pieces into the bottom of the pan. Wrap each piece of chicken in bacon and place the chicken in s single layer in the pan. In a bowl, mix the soup and sour cream together. Then, spread on top of the meat to completely cover the meat. Bake, uncovered, for 3 hours at 275 or for 2 hours at 350. Then remove the chicken to a platter, but leave the sauce in the pan. Stir in the rice into sauce and add black pepper to taste. Enjoy!
If you need to feed a crowd, consider these slow cooker hot dogs--they could not be easier. Simply line up a whole bunch of hot dogs along the wall of your slow cooker. The key is that each dog has contact with the wall or bottom of the slow cooker. Set the slow cooker to high and let the hot dogs sit for several hours. You may want to occasionally turn the hot dogs so that they darken on all sides. No need to add anything else.
On the Fourth of July, the family got together at Mom's, and she made these tasty hot dogs. She cooked these for about 2 hours. Cooking them longer will get the outside even crispier, which Megan and I particularly enjoy. The taste of these slow cooker hot dogs is unique--crispy on the outside and juicy on the inside. When I was a kid, I always put ketchup on my hot dog. Some say that mustard reigns supreme and that ketchup has no business being on a hot dog. But you can put whatever you want on your hot dog and I won't argue with you.
Slow Cooker Hot Dogs
Hot dogs (enough to line your slow cooker)
Buns
Your favorite hot dog toppings
Line the hot dogs up along the wall and bottom of the slow cooker. Set on high and let the slow cooker so the work. Rotate the the dogs to evenly brown all sides. Cook the dogs for several hours. Enjoy with your favorite toppings.
Sloppy Joes were part of Mom's regular rotation of weeknight meals. This recipe is an old one. In later years, Mom starting going the easier route and made Sloppy Joes from a can mix. But this recipe is very easy.
Sloppy Joes are an American original. There are many variations and many names for this sandwich, and MDS tells me that his mom had a variation with Mexican spices that she called Sloppy Joses. The essential ingredients are ground beef, tomato sauce, onions, and spices. Mom's recipe also includes sliced hot dogs. I have not seen other recipes calling for sliced hot dogs, but the hot dogs were a hit. I suspect that Mom had to finely chop the onion and the green pepper to hide it from us kids to make it more likely that we would eat it. Nowadays, I really like the onions and green pepper, so I added extra here.
This Sloppy Joe recipe
uses very basic white bread buns. They are the kind that can absorb a lot and remain together. But any other type of bun could be used.
Sloppy Joes
1 pound ground beef
1 medium onion, chopped
1/2 cup chopped green onion
1/2 pound beef franks, sliced
1 8-ounce can tomato sauce
1 tsp. salt
1 tsp. chili powder
In a skillet, brown the beef. Add in the onion and green pepper and cook until tender. Stir in the remaining ingredients and simmer until heated through. Serve on buns. Enjoy!
On this Father's Day, I honor the memory of Dad. It is hard to believe that it has been almost three years; I still miss Dad every day. But I am lucky to have so many good memories. Dad loved to eat and had many favorite recipes, and rice pudding was one of his favorite treats.
Mom made rice pudding when there was leftover rice from Chinese takeout. So a nice bonus of writing about rice pudding this week was that we got to eat Chinese food. But any rice will do for this recipe. The nice thing about this recipe is that the ingredients are usually just what you have around the house.
Rice Pudding
1 cup rice
4 eggs, separated
¾ cup sugar
4 cups milk scalded
½ cup raisins
½ tsp. cinnamon
Cook rice according to package directions. Beat egg yolks with ¼ cup sugar until thick. Add rice, milk, raisins and cinnamon; mix thoroughly. Beat egg whites until stiff but not dry; beat remaining ½ cup sugar gradually. Fold into rice mixture. Turn into a greased 3-quart casserole dish. Bake at 325 for 50 minutes. Enjoy!
The green coloring of this cake makes it a great seasonal specialty, including Christmas Holidays. Mom usually made this cake for St. Patrick's Day. But there is no need to wait for a holiday to enjoy this easy cake.
Mom made this cake using a box of yellow cake mix. You could also make any yellow cake recipe. The special addition is a box of instant pistachio pudding. If you use a boxed cake mix, be sure to use one without pudding, otherwise, the additional pudding will result in more of a pudding and less of a cake. After baking, this cake is a similar in density and taste to a pound cake; but, the pistachio flavor and green color make this cake unique.
The whipped cream topping likewise is spruced up with another box of instant pistachio pudding. Mom seemed to think that she always just used cool whip mixed with the pudding, but Megan and I clearly remember that she used whipping cream. I used to love to lick the beaters after the frosting was made. I must admit that I still do.
I made this cake for a regular Saturday night at Mom's house. Besides myself and MDS, the usual crowd was there: Mom, Megan, Tim, Ryan, Amanda, Ava, Patrick, and Lorelei. Mike also stopped by to play some football. Baby Delilah even made a brief appearance. The cake was a hit.
Pistachio Pudding Cake
Cake
1 box yellow cake mix (without pudding)
3 1/2 ounce instant pistachio pudding mix
2 eggs
1 1/2 cup milk
Blend all ingredients using an electric blender until well blended. Pour into a greased and floured bundt pan. Bake at 350 for 40 minutes. Allow to cool before frosting.
Frosting
3 1/2 ounce instant pistachio pudding mix
1 pint whipping cream
Using an electric beater, mix the cream and the pudding mix until soft peaks form. Spread on the cake. Enjoy!